
Back a few weeks ago I identified the problems with my power window was the W126 front window regulator. In particular, the passengers side front. The regulator was missing some teeth. I had bought a new one some weeks ago, but the regulator was in the shipment that FedEx lost. I went with a VDO regulator as I expected it to be higher quality than a Meyle unit.
Due to the lost parcel, I had been driving around with the door card removed for weeks. I was rather pleased to see the box arrive yesterday. The new regulator looked identical to the old one.
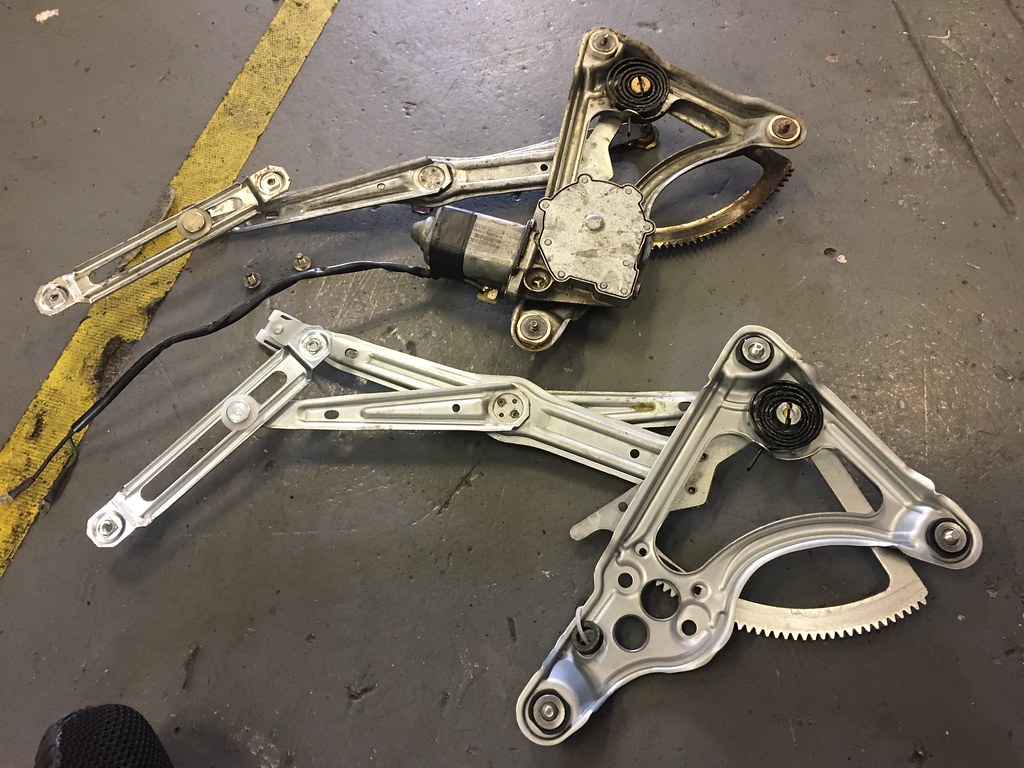
I wasn’t looking forward to this job. I expected it to be quite time consuming. In the end, I was pleasantly surprised. The workshop manual had a good step by step guide to removing the old regulator. I had it out in a few minutes. The most difficult part was removing the slide from the window channel.
Once I had removed the old W126 front window regulator, the next step was swapping the motor. I carefully cleaned up the old hardened grease as best I could. There is a metal plate that bolts on to hold the motor to the teeth and I gave this bit a good clean in brake cleaner. I didn’t want to use that so close to the motor so I used rags for the motor and the window channel.

The new regulator came with two plastic spacers that were not present on my old one. I used them on the two bolts next to the teeth. That seemed the most reasonable place, although they were not mentioned in the workshop manual. I’m not sure if this is right.
I put plenty of new grease on the moving parts of the new regulator. Getting it back in was also quite easy. The instructions had the usual (and useless) comment that installation is the reverse of the removal. I found that the easiest way to do it was to first put the slide on the window channel (with new grease), then the bolt to the other side of the window, then the regulator to the door, then the other slide to the door. While I still had access to the inside of the door I sprayed it with fish oil.
The most tedious part of the job was getting the door card on properly without breaking all the tabs. The moisture barrier on my car was completely shredded, so I made a new one of out builders film. It worked reasonably well. I first cut a rough shape and then taped it to the door. I then used a sharpie to work out where I needed to trim and some adhesive to stick it to the door.
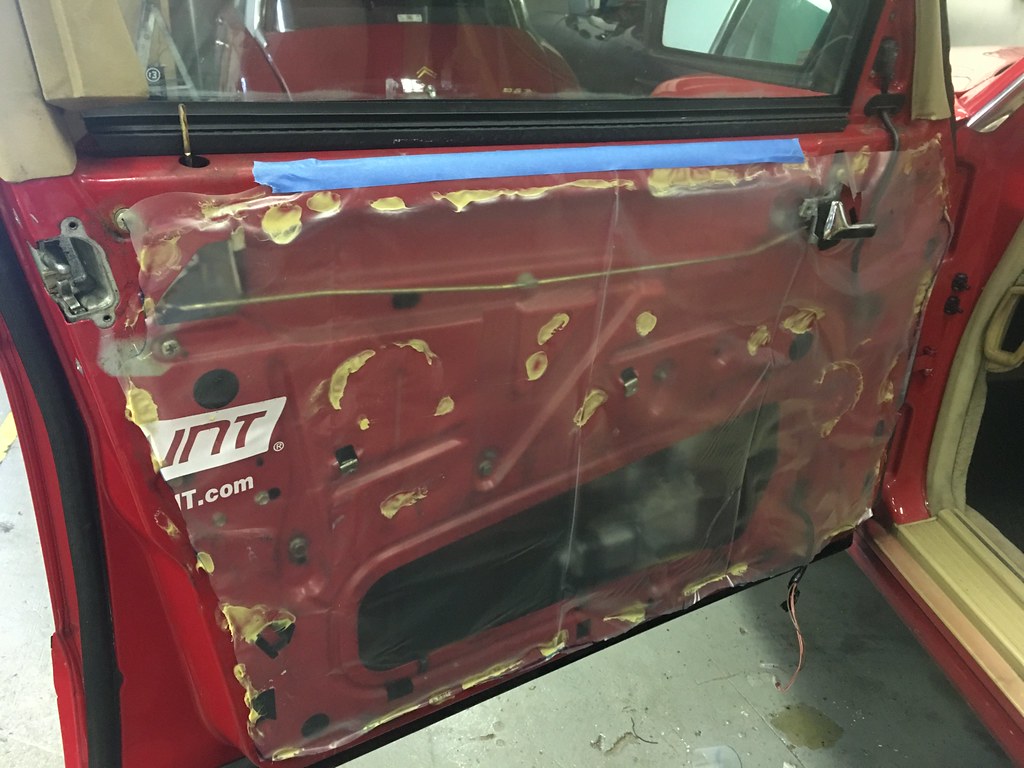 Getting all the hooks into the door at the same time took me ages. I hadn’t removed the upper window trim, so I found it easier to get the first tab on the left started away from the window trim then slide it across. The bottom tab was also a pain. The wiring for the light then needs to be pushed into a little hole which leads to the cavity where the light is. I found the only way to do that was lying down under the door. I also used a pick tool to get the door lock button through its little hole.

All this trim is now very brittle after 30+ years. I managed not to break any of the door trim but the tab to hold in the lower light snapped off. I’ll have to see if that light is still available. After replacing the W126 front window regulator I now have a properly working front passengers window. There is also a strip of glass I have never seen now it rises to the top.


Leave a Reply