W126 door striker saga
Back a couple of months back, I found myself unable to close the rear passengers door of my 560SEL. It would close, but not latch properly. Having a look, I saw the insert in the door striker had disintegrated, so I figured this would be a simple fix.
I’ve swapped door strikers on other cars before with no issue, I think on my 450SLC and my old 300SE. However, since then, the parts situation on youngtimer Mercedes has deteriorated. All the parts suppliers seemed to only stock the URO parts striker. While I have no personal experience with it, reviews are pretty bad. I’ve seen photos of this unit showing that I can’t even sit flat. Some people seem to buy it and remove the rubber insert and use it on the metal housing of an original striker.
Since there are 3D printed striker inserts available, I figured I would go down that route. I bought a set online and then went about fixing my door.
My first issue was removal of the old striker. While three of the hex screws came out fine, one rounded and wouldn’t budge. These seem to be a pretty soft metal. I know when I had my parts car, I was only able to remove one of the four strikers, as the other three had rounded bolts.

I first tried to use a cold chisel to knock the bolt in the right direction. I’ve used that technique before with success. However, I wasn’t able to get a great angle to make this work, and just managed to scratch the paint near the striker. Luckily not visible when the door is closed.
My next idea was to get some bolt extractors online. These are the ones that you put into your drill. I got nowhere with those either. I spent a few hours trying to drill it out, and while the metal might be soft enough to round the hex head, it was too hard for the crappy drill bits I was using.

At this point I figured I needed to get some proper tools. I bought some high quality cobalt drill bits that were better suited to the task, and a much higher quality bolt extractor. With the right tools, I had the old bolt out in quick order.
It wasn’t too hard to work out how to replace the insert. The old one had totally disintegrated. Because of this, I wasn’t able to do a direct comparison between old and new. Since I had to drill out one of the bolts, I had to replace it. Luckily I had one good one from the parts car, so used that.

I put the repaired insert back in the same place as the old one, and expected this to be the end of the saga. I was wrong. The door was no better. I spent some more time making slight adjustments to no avail.
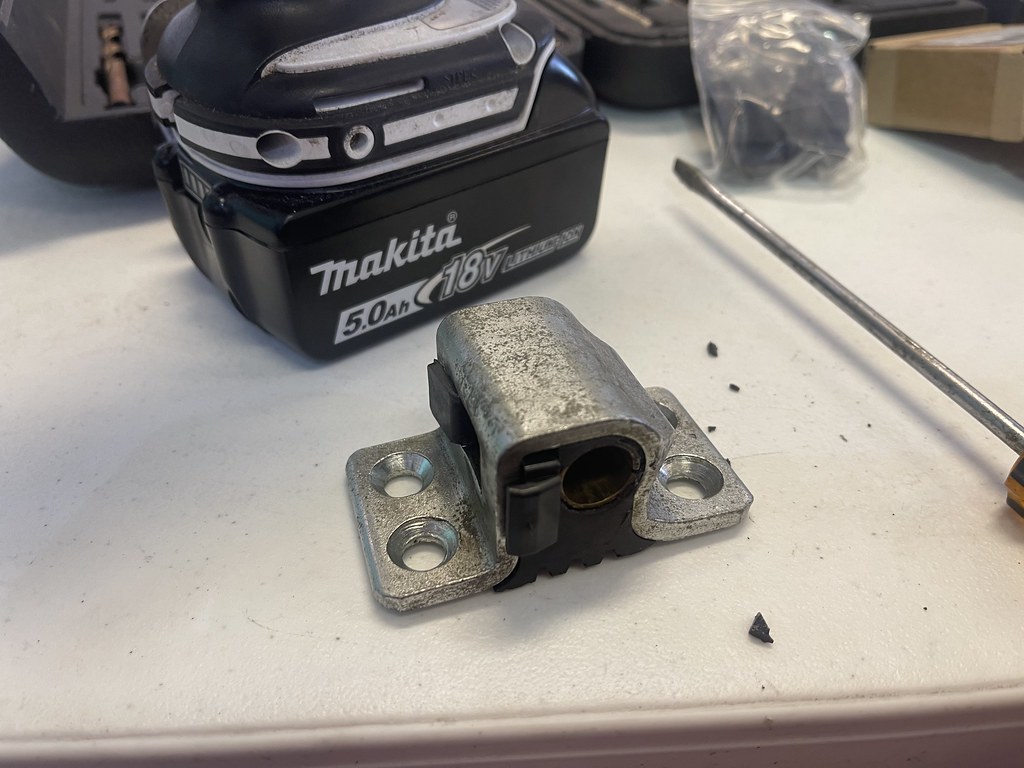
After some more research, I found that the reviews on the inserts made from hard plastic are not good, and that the soft plastic versions are much better. I therefore decided to try a set of those.
Changing the hard insert for the soft one wasn’t very hard, but it still didn’t fix the problem. I therefore, tried loosening the striker and letting the door locate it. That didn’t seem to help much. I also tried putting grease around the aperture of the striker bore. This was to see if the pin wasn’t striking straight. It did seem to be hitting slightly too low and to the right. While I was there, I also greased the door latch mechanism, and extracted a few small bits of plastic from the old striker.

Eventually, after a few hours, I managed to get the door to latch, but I’m not very happy with it. It is sitting about 2mm too low and a few mm too far out. I tried a few times to get the door to latch by moving the striker a little in and up, but when I did that, it would no longer latch.
For now I at least have a door that works. It must be slammed, and the position isn’t quite right, but it works. I’ll need to do some further investigation and return to this in the future.