
450SLC Becker Mexico Cassette install part 4 – Final installation
I am currently in the process of installing a Becker Mexico Cassette in my 1977 Mercedes 450SLC. In part one, I covered buying and testing the radio. In part two, I covered upgrading the speakers, and in part three I covered the wiring. This part will be all about actually installing everything.
My first task was setting up the control button and microphone for the Tranzit BLU. The control button makes this a truly hands free system. It is used to control the functions of the Tranzit BLU such as accepting calls, hanging up, skipping a track and so on. This should be an any easy to reach, but unobtrusive spot. I chose the underside of the steering column, just where it comes out near the underdash panels. The microphone is used for hands free calling and I put it at the top of the drivers side A pillar – where there was an existing microphone from a long removed phone car kit.
To access this area, I had to remove the drivers side under dash panel. These are very delicate now, so I had to take a lot of car. I was then able to use electrical tape to bind together the wires for the button and microphone to push them through the back of the dash – firstly to the where the head unit would go, and then to the passengers side where the Tranzit BLU be. This is a very fiddly job.
Because the car previously had a modern radio, all the speaker wires ended up behind the head unit. For the Becker, they need to be in the passengers side foot well to join to the amplifier. Normally, they would go through the fader unit, but I just joined them all up instead. I wired them up in parallel as this is what the car appeared to do originally, albeit with a strange shared ground arrangement.
As far as I can tell, the original speakers were 5 Ohms. Mine are 4 Ohms, so while not identical, quite close. In parallel this should be 2 Ohms vs 2.5 Ohms, which I hope is ok. The specifications for the Becker amplifier talk about it having 7W per channel with four speakers for 5W per channel with 2. This also led me to believe parallel is the way to go. The speaker wires and amplifier connection also needed to be pushed through the narrow spot behind the dash to the passengers side. Anyone installing a Becker I would encourage you to do your own research here.
The hardest part of all of this pushing wires through narrow gaps was the antenna connection from the Tranzit BLU. This goes from the passengers side to the head unit. It has a 90 degree bend in the plug, which makes it very hard to push through small gaps. Even using a guide wire to pull it through and a lot of tape to smooth it over, it took about 30 minutes of trying before I finally had it through and plugged into the Becker Mexico.

To install the Becker Mexico, the knobs front face is gently removed. It is very easy to crack the faceplate. There are two securing brackets that are normally used, but this part of my dash is quite cracked so I didn’t use them here. Unlike the earlier cars it sits quite well. While the face was off, I took the opportunity to clean it.

Before I properly installed the amplifier, I did another system test. I found everything was working except for the control button for the Tranzit BLU. I checked and it was connected properly. The manual that came with the Tranzit BLU didn’t have any more help. However, I found another version of the manual online which had an extended troubleshooting section. This section covered using the dip switches on the unit to put it into ‘learning mode’ so it could ‘learn’ the value of the button.
The first time I tried this, it seemed to work, but pressing the button would disconnect Bluetooth. I had managed to make it worse. I was starting to worry I had damaged the button somehow pushing it through various dash gaps. Trying the process again seemed to fix the issue and I now had a working control button. The only slight annoyance is that each time I turn on the car or radio, I have to ‘engage’ the Tranzit BLU. On the 560SEC and 300TE, I don’t. I’ve emailed iSimple to find out how I change this.
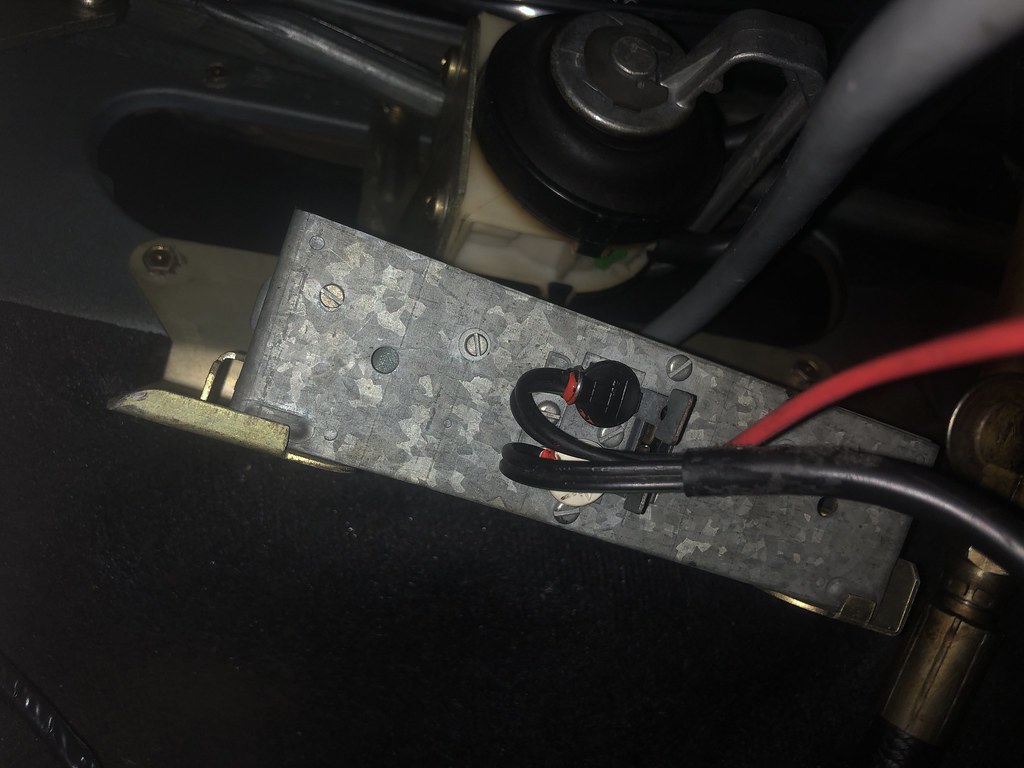
Now it was time to install the guts of the system in the dash behind the glove box. The original bracket for the amp was still there, and since I had the original amp, it snapped right in. I used a couple of cable ties to hang the two relays off the bracket as well. Looking at the photo, I see I forgot to bend back the tabs to hold in the speaker wires. This needs to be done before I re-install the lower dash panel.
I put the lower dash panel back on the drivers side, but so far I have left it off the passengers side. I want to drive the car a bit to make sure I am happy with everything first. Those panels are so brittle, I am very careful how often I handle them. I need to do a dry run for the June 2023 night drive, so I’ll probably take the 450SLC.
At least in the small test drive, I am really happy with the result. Granted sound quality isn’t quite as good going through an FM transmitter, but its good enough and the Becker fits so well into the dash of the car. So far the only thing I have noticed is that the ‘Stereo’ light on the Becker has stopped working for some reason. It worked during testing, although at one point it stopped working and them seemed ok again.


This is part of a series of articles on installing the Becker Mexico Cassette in my 1977 450SLC.
1) Procuring and testing the radio: https://www.classicjalopy.com/2022/07/planning-becker-radio-installs/
2) Cleaning up old wiring: https://www.classicjalopy.com/2021/11/450slc-radio-wiring/
3) Install Part 1 – Preparing the radio: https://www.classicjalopy.com/2023/05/450slc-becker-mexico-cassette-install-part-1-preparing-the-radio/
4) Install Part 2 – Upgrading the speakers: https://www.classicjalopy.com/2023/05/450slc-becker-mexico-cassette-install-part-2-upgrading-the-speakers/
5) Install Part 3 – Wiring Up the Becker: https://www.classicjalopy.com/2023/05/450slc-becker-mexico-cassette-install-part-3-wiring-up-the-becker/
6) Install Part 4 – Final installation: https://www.classicjalopy.com/2023/06/450slc-becker-mexico-cassette-install-part-4-final-installation/