
450SLC radio wiring
I’ve been doing quite a bit of work to my 450SLC lately. One of my more recent jobs has been to fix the A/C condensate leak. While I was there, I noticed that rats nest of wiring for old amplifiers, car alarms and car phones. I removed most of this, but the result was that the radio in the car was no longer working. The photo below shows just some of the old wiring I removed from the car. My task today was to investigate the 450SLC radio wiring to work out why.

The radio in the car is an early 2000s unit I originally bought for my 1986 300E when I lived in Denver. When I sold the 300E I put a cheap radio back in and kept this unit. It’s a Pioneer Premier which is like Lexus is to Toyota. It was a pretty good radio for 2001 – with MP3 CD function and more. I had the radio fitted to the SLC after I purchased it in 2003 – the car had a fairly crappy 90s unit installed at the time of purchase. Its doing pretty well to still be working after 20 years. At some point I will probably install a retrosound unit similar to the 250SE, but that is a future project.
The first task was to remove the radio and check to see if it had power or not. As I didn’t install the radio myself, I did not have the correct DIN removal tool. I purchased a full set of DIN tools online. I figured it would be a useful tool for the future.
 The purchase was definitely worth it, as I had the radio out in a matter of minutes. The pioneer tools were a perfect fit – I guess they haven’t changed them in 20 years! Some of them have rather odd shapes, so but its good to have all the standard types.
 The steering wheel is only loosely on at the moment as the odometer is out for repair. I found it easier to remove the instrument cluster and give the radio a bit of a push from behind. As with the other stuff I removed, the 450SLC radio wiring is pretty messy. I didn’t try and clean that up as I’ll do it at the same time I replace the radio and probably install new speakers.
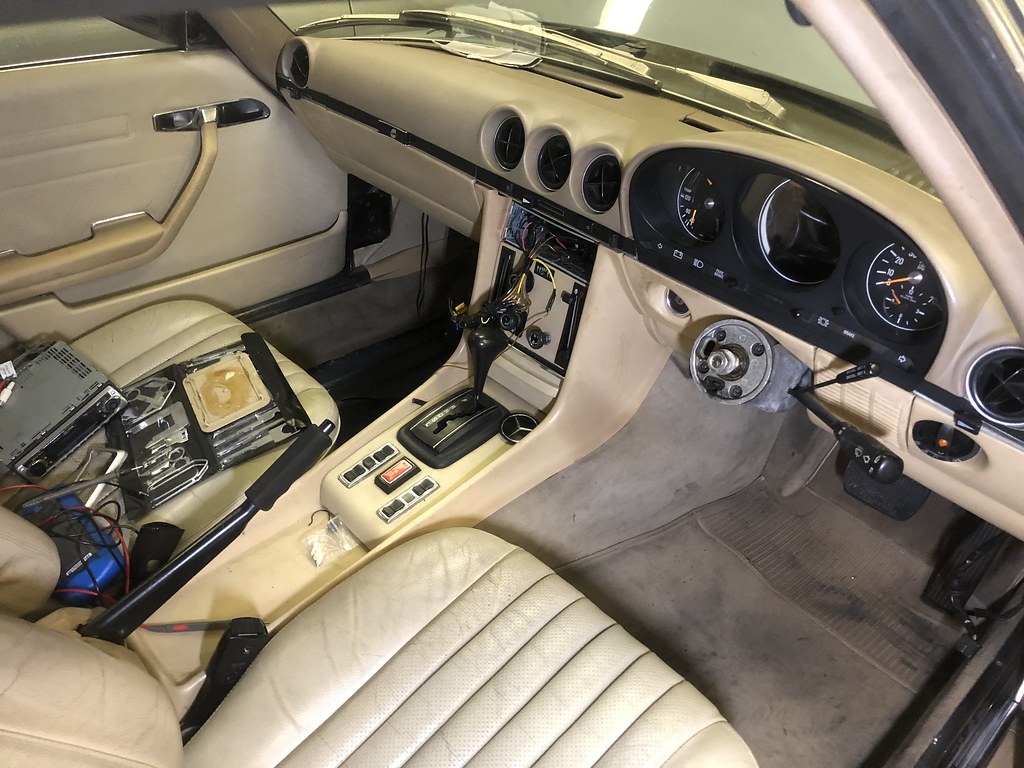 Once the radio was out it was pretty apparent what the problem was. The yellow wire for permanent 12v was connected to and old bit of speaker wire I had removed. The switched 12v was working correctly however. This old bit of speaker wire had been connected to one of the old car phone bits which was in turn connected to the fuse box.
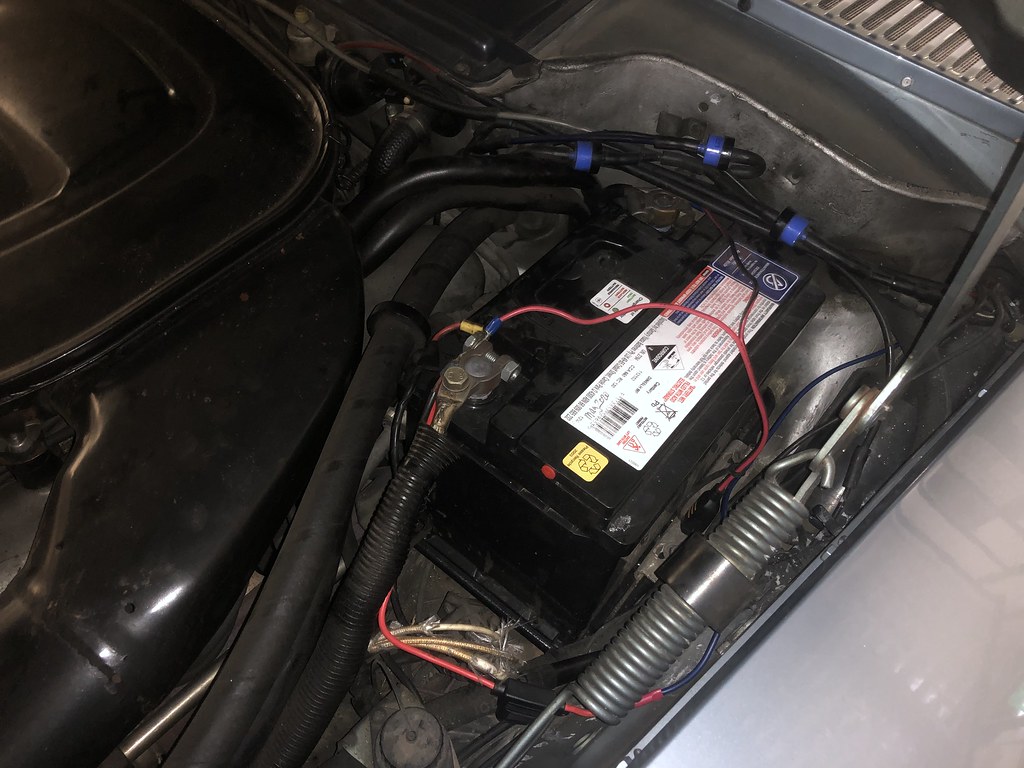
As modern radios use more power than the original Becker units, I figured the best approach was to run a new wire from the battery to the radio, with an inline fuse. This is pretty easy to do with the under dash panels removed. There is a big rubber grommet near the battery that lets a bunch of vacuum lines and wires go from the engine bay to the cabin of the car. I was able to push a new wire through fairly easily. It was actually easier to do it from the cabin to the engine bay as the vacuum lines turn almost 90 degrees once they enter the cabin. I then use an inline blade fuse holder and a connector to the positive battery terminal.
 A quick test showed the radio working. The new 450SLC radio wiring is much neater than before and I have a working radio again.
While I was there, I had another issue to investigate. I had replaced the sunroof switch about 10 years ago, but without the instrument cluster removed, I couldn’t plug it in without removing the rear dome light switch. This gave me access to plug in the sunroof switch. At the time I figured a working sunroof was more important than a working dome light. However, with the dome light switch plugged back in, I blew fuse #1. In the end I just disconnected the switch again. I have not really missed the dome light since I disconnected it.


This is part of a series of articles on installing the Becker Mexico Cassette in my 1977 450SLC.
1) Procuring and testing the radio: https://www.classicjalopy.com/2022/07/planning-becker-radio-installs/
2) Cleaning up old wiring: https://www.classicjalopy.com/2021/11/450slc-radio-wiring/
3) Install Part 1 – Preparing the radio: https://www.classicjalopy.com/2023/05/450slc-becker-mexico-cassette-install-part-1-preparing-the-radio/
4) Install Part 2 – Upgrading the speakers: https://www.classicjalopy.com/2023/05/450slc-becker-mexico-cassette-install-part-2-upgrading-the-speakers/
5) Install Part 3 – Wiring Up the Becker: https://www.classicjalopy.com/2023/05/450slc-becker-mexico-cassette-install-part-3-wiring-up-the-becker/
6) Install Part 4 – Final installation: https://www.classicjalopy.com/2023/06/450slc-becker-mexico-cassette-install-part-4-final-installation/