
W116 Seat repair
Now I had the 280SE at the point where I could drive it more, I wanted to attend to the drivers seat. Like most of these cars, years of driving had caused at least some of the springs to break, causing it to feel collapsed and lopsided. The first Mercedes I ever owned, my 1985 230E already had this issue on purchase. It was only 13 years old at the time. This 280SE is over 40 years old, so it’s not surprising.
This is a common thing on these old Mercedes, so I assumed I had a couple of broken springs in the seat. So I could complete the job in one go, I went and bought some supplies. To reinforce the springs, I bought a 3/16″ threaded rod. It’s thin enough I thought my brake pipe bender would allow me to bend to shape. I also bought a couple of pieces of hardware to attach at each end, and then some thin wire to wind around the piece so it stayed on the spring. I also bought a square of high density foam to pack into the seat springs.

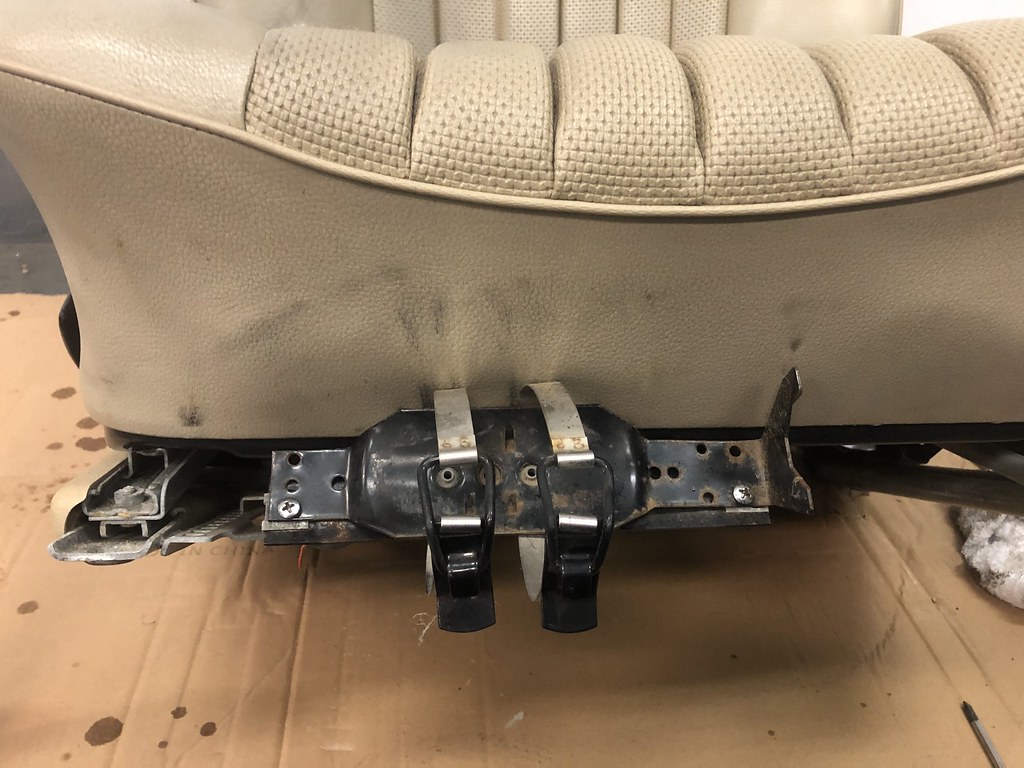
Getting the W116 seat out is quite easy. Five 10mm bolts. You need to use the both the height adjusting and for/aft tracks to expose the bolts. I did the front first, then back. It helps to lower the headrest and raise the recline angle to get the seat out of the car. The 5th bolt attaches a track to the transmission tunnel.
Once the seat was out, I laid it out on a clean piece of cardboard. Looking underneath, it was quickly apparent I had two broken springs. It was also great to see what great condition the rest of the seat was in. The mechanism and horsehair paid were in great shape. There is a small rip and some minor discolouring on the drivers seat, but its in otherwise nice condition too.
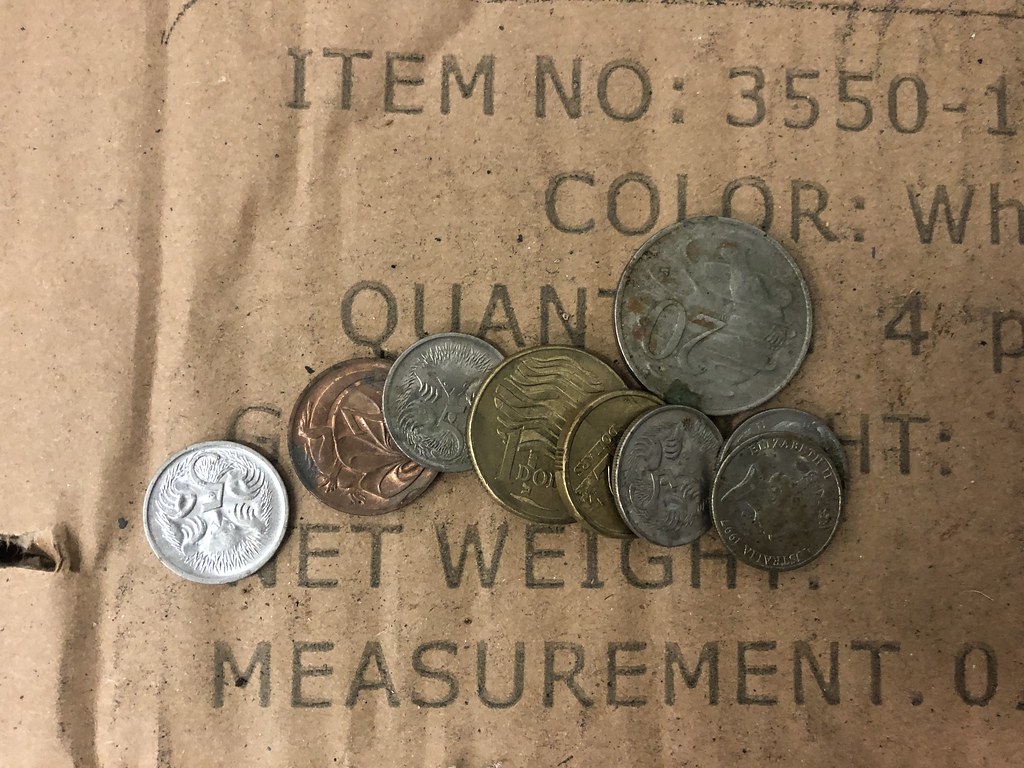
I also found $3.47 worth of change underneath the car, including a 2c coin. Those coins have been out of circulation since 1994! Looking at the years of the coins, they ranged from 1976-1997. That corresponds to my suspicion that the car was not used a great deal for the last 20 years. I have no history for this period, but there are a number of clues.
Fixing the springs does not require the W116 seat to be disassembled. I was able to do it all from the bottom. First I gently put the broken springs back int the right spot. I then cut and bent my piece of threaded rod. The threaded rod is probably way overkill for this job, but it will certainly have the strength I need. The grooves will also help the wire grip.

With the rod in the right shape, I used the fasteners to gently attach it to the spring. I didn’t want to use too much pressure yet, in case it popped out of shape. I then wound the wire around the old spring and rod, until it was nice and snug. After that, I tightened up the fasteners and added a couple of cable ties for good measure. The repair seemed quite strong.

I then cut some of my foam into strips. Some longer thin sections for the sides and front, and then some smaller sections to re-enforce the main springs.
While the seat was out, I also replaced the broken fire extinguisher bracket with a better one I had one hand, and clean the seat as best I could. Overall it came up pretty well. I also lubricated the tracks as I could without taking them apart.
Getting the W116 seat back in was surprisingly the hardest part of the whole enterprise. I had originally planned to have it back in quickly then do an oil change on the car. In the end it two two hours and I had to postpone the oil change.

I had a couple of challenges. I first tried to put the seat in using the front bolts first, but I couldn’t make all the bolts line up. The height adjustable lever was already almost broken, and during the course of putting the seat in/out it finally broke. I’ll have to try the Kent Bergsma bolt on solution.
After a few tries, I found it was easiest to get the back bolts in first, and then try and manhandle the seat around until I could get the fronts in. I’m glad I did a strong seat repair, as pushing the seat up and down on the height track puts a fair amount of pressure on the springs.
With the seat back in, I’m pretty happy with this repair. The seat is no longer sagging to one side and the car is much nicer to drive. One more item ticked off the list.


2 Responses
[…] W116 Seat repair […]
[…] Where the 450 stood out is that leather is a nicer material to sit on that MB-TEX. As I have fixed the springs on the 280 seat, The 280 was a bit more comfortable. I think the 450 probably has one broken […]