
W126 Becker Radio install – part 2
In part 1 of this series, I had begun installing a Becker Mexico 1402 in my 560SEC. I had planned out my install and done the core wiring for the Becker itself. Today, my goal was to complete the wiring of the ancillary components and test the system.
I decided to use two X30 harneses for the install. I had four available plugs on the X30 power block, so it kept it neater if I used two. The main purpose of the first one was to connect my USB ports. I also used one of the ground wires for the Tranzit BLU. For this application I only needed pin 5 and pin 1. I removed the wire for pin 3. The USB ports will be available when the car is in the accessory position, starting or running. I thought about making them live all the time, but I am not sure of any minor current draw from the USB port module. As this car is not used daily, I don’t want any current draw. No more driving around with the ashtray hanging open.
 The nice thing about this setup, is that I can simply unplug the module if I ever need to. The ground wire for the Tranzit BLU will have a plug for the same purpose. The second X30 harness will power the relay which controls turning on the amplifier, and powering the Tranzit BLU. I don’t want the Tranzit BLU running with the radio switched off, as my phone will pair with it and it will be useless. The relay will be triggered by the wire from the Becker that normally controls the electric antenna, but the relay will now fire all these things. The amplifier has a trigger wire for a second amp or antenna, so I will use that one for my power antenna.
I originally cut this harness shorter as the length required is only from the X30 power block to the footwell. I forgot that the wires from the X30 exit forwards, so I had to join it back together again. In any case, I now have the X30 wiring in place and two spots remaining.
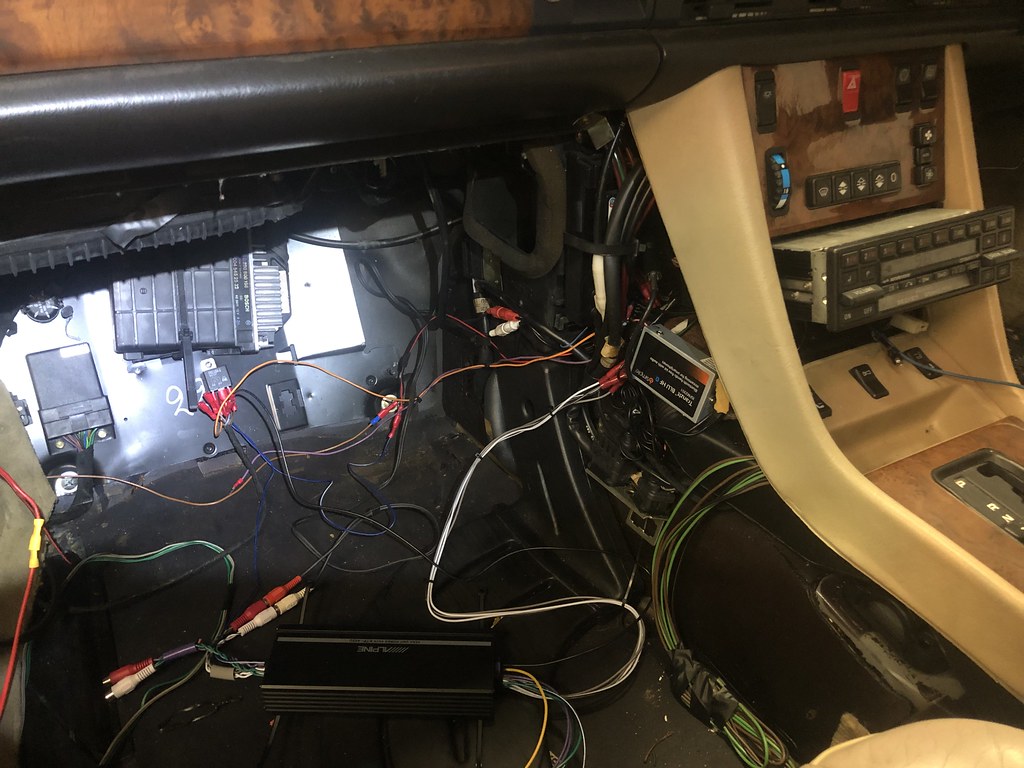
 I mounted the relay in the passengers foot well using an existing screw. It was probably for the previous Cobra alarm. Next step was some basic tidying up of the wiring so I could see what I was working with. That meant using some cable ties of the various wiring groups like front speakers, rear speakers, relay triggers etc.
To test the system, I needed core power to the amplifier. There was still a wire from the battery to this area of the car from the old Cobra car alarm. I was able to repurpose it with a new 15A inline fuse. Once done, it was a fairly simple matter of plugging the various connections together for a test of the system. Before that test, I had to configure the amplifier. There are some dip switches on the back where I set the input for two channel. I also turned on the high pass filters – for the test I used the 60Hz option for the fronts and the 80Hz option for the rears.
 Powering it on, it all seemed to work properly first time. Normally when I do projects like this, there are issues I need to address. Before I paired my phone, I was able to listen to the radio as normal. Once I paired my phone I was able to play music through the system. It sounds pretty good! I adjusted the gain levels slightly on the amp while testing a wide variety of songs. I also wanted to make sure the left/right speakers were installed properly. Queen’s Bohemian Rhapsody is useful for this. The small button used to control the Tranzit BLU also worked correctly. When in music playing mode, pressing it advances to the next track. By now it was 11:30PM, so I didn’t test the handsfree calling function.
Since the music from my phone is going through the FM signal, its not perfect. It is very good though, thanks to injecting the FM signals right into the antenna cable. The Alpine amplifier means the Becker is easily able to power four modern speakers.
The USB ports were also working correctly and powered my phone without issue.
Next steps from here is to mount the amplifier properly and tidy up the wiring. I may also play with the high pass filter a bit more. 80Hz might be a bit ambitious for the 6.5″ rear speakers in a W126. Then all the trim needs to be re-installed.


This is part of an series of articles on installing the Becker Mexico cassette in my 560SEC:
1) Procuring and testing the radio: https://www.classicjalopy.com/2022/07/planning-becker-radio-installs/
2) Testing the line out module: https://www.classicjalopy.com/2022/08/connecting-the-becker-line-out-module-to-a-modern-amplifier/
3) Locating the X30 power block on RHD cars: https://www.classicjalopy.com/2022/09/locating-the-w126-x30-power-block-on-rhd-cars/
4) Install Part 1: https://www.classicjalopy.com/2022/09/w126-becker-radio-install-part-1/
5) Install Part 2: https://www.classicjalopy.com/2022/09/w126-becker-radio-install-part-2/
6) Install Part 3: https://www.classicjalopy.com/2022/09/w126-becker-radio-install-part-3/
7) Install Part 4: https://www.classicjalopy.com/2022/10/w126-becker-radio-install-part-4/