
W126 stuck power window
Late last year the power window on my 1987 Mercedes 560SEL stuck in the down position. I lowered the window to exit a parking station and the window would not go back up. The first test I did was to check the switch. This would have been the easiest and simplest repair. It is very easy to swap the plug on the front and rear switches, but unfortunately I was able to rule out the switch.
At that point I was preparing the 560SEC for the concours run and the 300TE for the Tasmania trip, so I parked the 560SEL to look at after those events.
I assumed that the problem was going to be a broken plastic slide in the window regulator. This is a very common problem on the W126. I was so sure this was the issue that I bought a couple of these slides online.

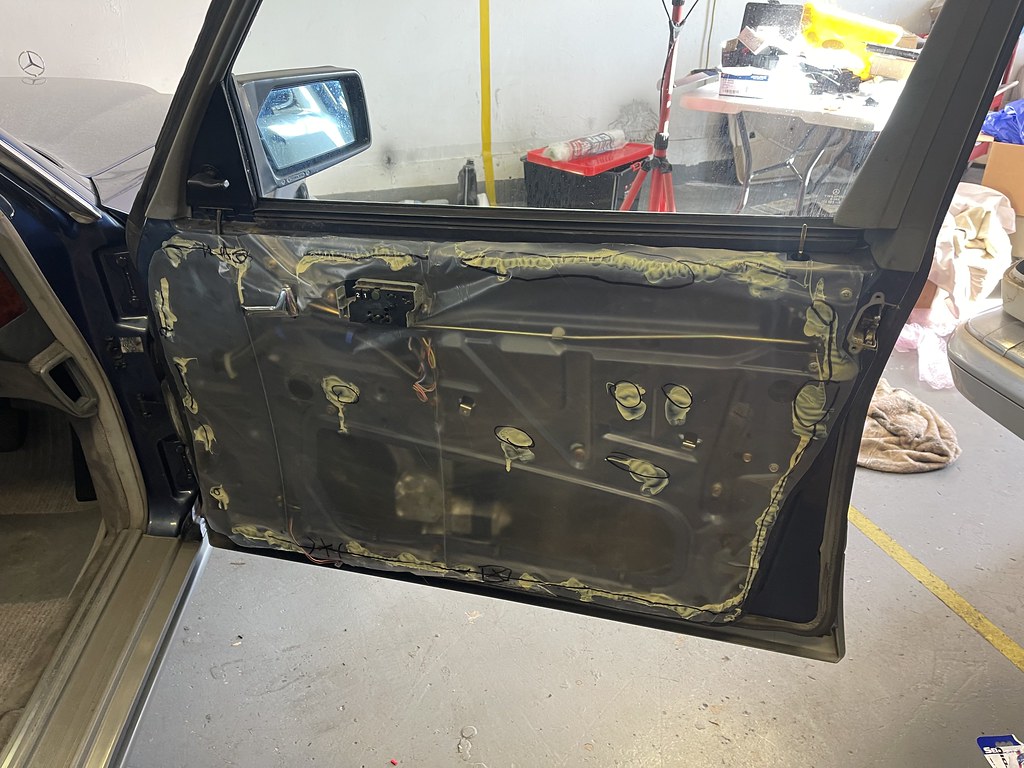
Earlier this year, I finally removed the door trim and the slide was in perfect condition. Removal of the W126 door trim is wel documented, but there are a few gotchas. The first is that the trim should never be pulled outward until it is pulled up and plastic hooks are clear of the door. They will break otherwise. Secondly, there is a tiny plastic circlip in the electric seat switch. This is often missing, but was still present on my car. All the other doors I’ve removed the trim that had power seats were missing that circlip.

I couldn’t see any obvious issue other than the window being stuck. At this point I was preparing for a couple of work trips, so I took the car to a mechanic to take a look at it. He removed the regulator and diagnosed a bad window motor. He showed me how the plastic gear inside the motor was binding up preventing the motor from working.
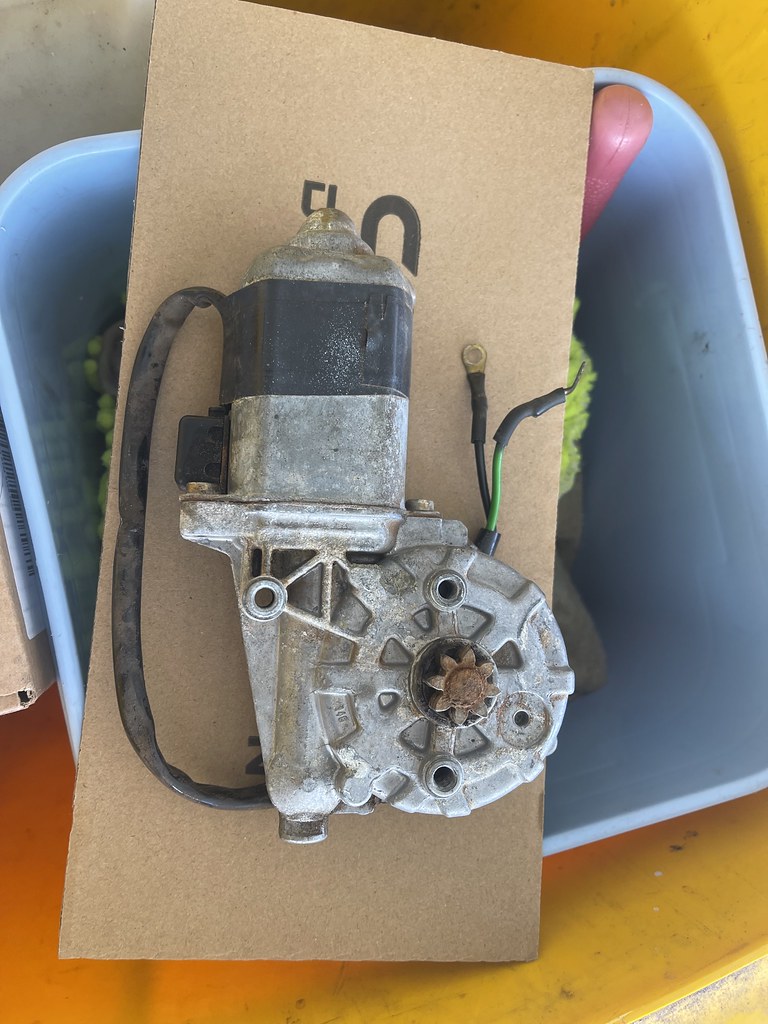
Enter the 420SEL parts car. I removed the motor from the front drivers side. The other motors are different and have different part numbers. The parts car motor looked a bit manky but it did work. I cleaned it up as best I could and dropped it off.
The parts car motor did the trick and I got the car back with a working window. My job was to put the trim back on. The first part was replacing the moisture barrier. The original one had a few rips in it, so my daughters and I made a new one from some plastic sheet, using the old one as a template.

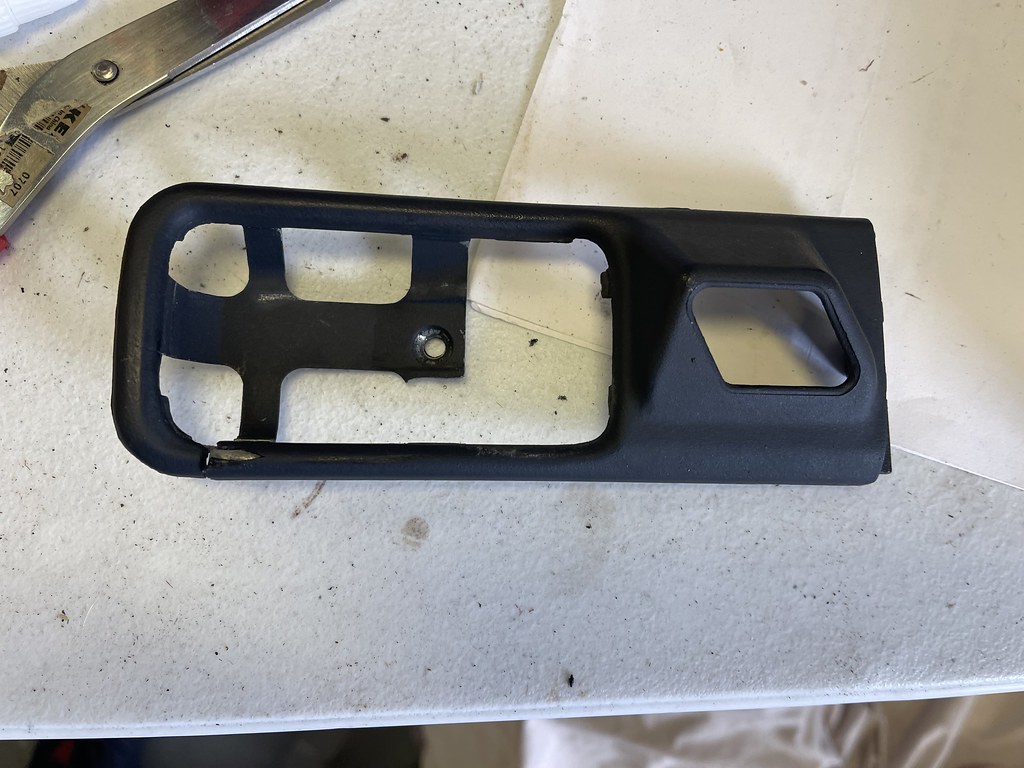
As well as the moisture barrier, I also replaced the pot metal bracket that goes around the door pull, and exchanged the door pull with one with slightly less play in the mechanism. The door pulls from the rear doors are the same and are generally less floppy. The metal bracket was broken as can be seen.
 The main trick with getting the door trim on is to remove the little trim strip that goes alongside the window aperture. It is held in with a single screw and then it lifts upwards and away. This allows the top of the door trim to better fit into the channel near the window.
The puddle light is also a bit of a pain as once its connected you need to keep the door trim near the door. From there the job is fiddly but not all that hard. The main thing is not breaking any of the clips when re-attaching the trim.
 It’s been good to have the 560SEL back and operational. I’ve been driving it pretty much daily for the last week.


1 Response
[…] this year: Drivers side window motor, odometer and uprated AC […]