
W124 Blower motor replacement – part 2
A few months ago, I started replacing the blower on my W124. I figured this would be a simple job and I would be back up and running a few days later. Little did I know that that the car would be off the road for months.
In part one, I removed the old W124 blower motor. I was not able to install my replacement motor, because it did not fit. I figured the issue was with the aftermarket part, so I ordered a brand new genuine W124 blower motor.

This arrived, and it was much better, but still not a perfect fit. It was still scraping on the housing somewhat. I spent a lot of time trying to get it to work without scraping. After trial and error, I found that the original bracket worked better than the one that came with the aftermarket fan, especially after trimming a little material from it. I also used only two of the three screws holding it on, with the rightmost screw very tight and the leftmost screw missing. With a lot of pushing and prodding I was eventually able to make it run with minimal scraping. The right squirrel cage really needed to be about 50mm further to the right.
I found the easiest way to do it was to leave the fan running while I did the re-assembly. That way I knew right away of something I did made the fan scrape again. This was particularly important when putting the lid on the housing and re-fitting the mono-wiper. I found sometimes I had to push on the housing again to stop the scraping. I hope that does not mean issues going over every bump or a sharp corner.

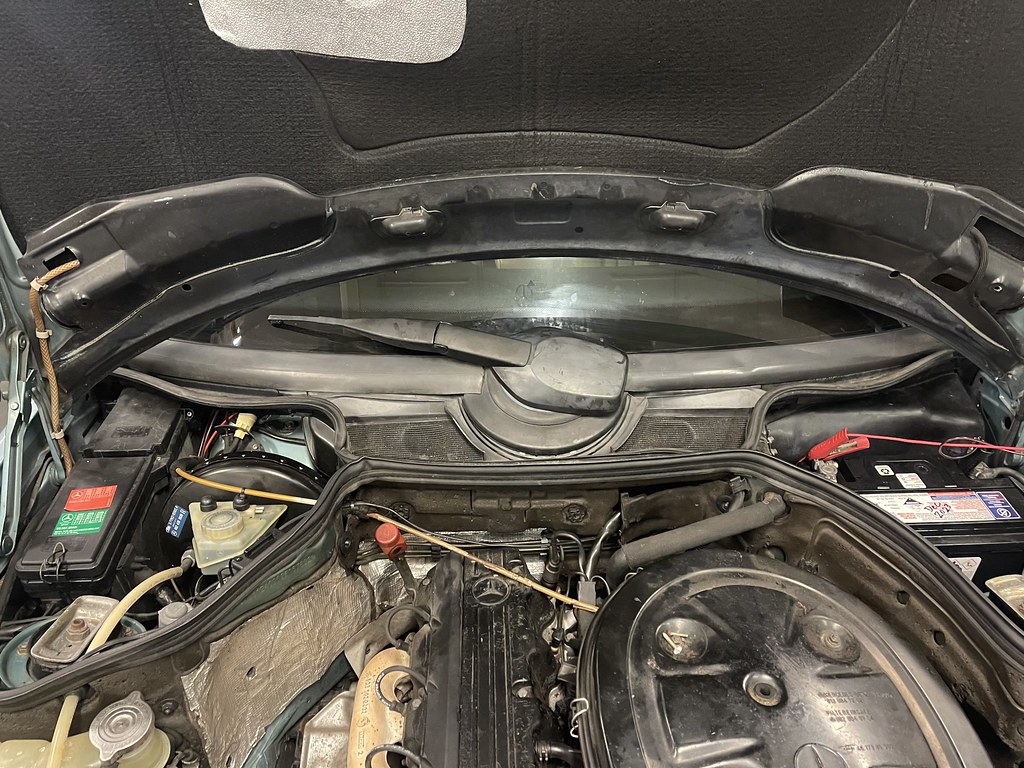
Getting the mono-wiper back on was quite fiddly. When I removed it, I had left the wiper blade on. In retrospect this was rather silly and it was much easier with the blade removed. I found it was easiest to position the fan motor first from the bottom, plug in the connector then position the assembly. There are four nuts plus the clip that go on to secure the mono-wiper. Two of the nuts are not easy to see, obscured by the rubber trim around the wiper base. I also used a little grease on the joints of the wiper mechanism, at least those that were visible from the rear of the assembly.
Once I had the mono-wiper back on, I realized that the flap at the top of the blower motor was down. I was pretty sure this was up when I first started this install. Sure enough, it was. This didn’t seem to be right, so I removed the mono-wiper and the top of the housing.

It turns out there is a linkage between the flap and a pivot point behind it. I’m not sure if the linkage was broken, or had just come off, but I could not get it back on. At this point I really wanted to get the car back on the road, so I left the flap in the halfway position and re-installed the W124 blower motor cover and the mono-wiper. I had just wasted two hours.
Getting the rest of the trim back in wasn’t too bad. The trim on my car is not in the best of shape in a few places, especially the lining of the inner firewall. I would love to get some better parts from a wreck at some point. Having the 420SEL parts car was quite a big help here. I was able to replace a few nuts and screws that were missing (or I dropped).

I was also able to clean out some water drains that were totally blocked up. In one area, I didn’t realize there was supposed to be a drain it was so blocked up.
I didn’t have time to take the car for a test drive, but everything is now back in and ready to go except for the wiper blade. I’m glad this job is finally done, and I can use the 300TE again.


1 Response
[…] Work this year: Replacing the blower motor. (part 1, part 2) […]