
I purchased my 1990 Mercedes 300TE with a modern Sony Xplod CD player. It was a fairly low end model that sounded pretty bad and looks really out of place in the W124 dash. The passengers front speaker was not working, adding to the poor sound. The S124 has very silly speakers in the rear, one of the few design flaws in the vehicle. Losing one of the front speakers is a major blow to sound in the car.
My car was first sold with a Becker Grand Prix 1402. The operating instructions is still in the owner manual kit. This is the same Becker I installed in my 1987 560SEC. I’ve been really happy with the setup in that car. My plan was to install something similar in the 300TE, but without the external amplifier. The speakers in the 300TE are quite small and I don’t think the additional amplifier is necessary. I will be using the Bluetooth FM injector, just like on the 560SEC.
The first step was to find a W124 Becker radio. I have been keeping an eye out since I bought the car. In the end I found a radio that had been purchased by a friend in the Mercedes Club for his W126. In the end he preferred something a bit more modern, but still with a classic look. As that radio was surplus to requirements, I purchased it for my 300TE. He had the radio refurbished a few years ago, so it tested fine.

For a W124 Becker radio install, a set of the plugs for the rear of the radio is also required. Luckily, I managed to secure a set from the parts car in Las Vegas last year.
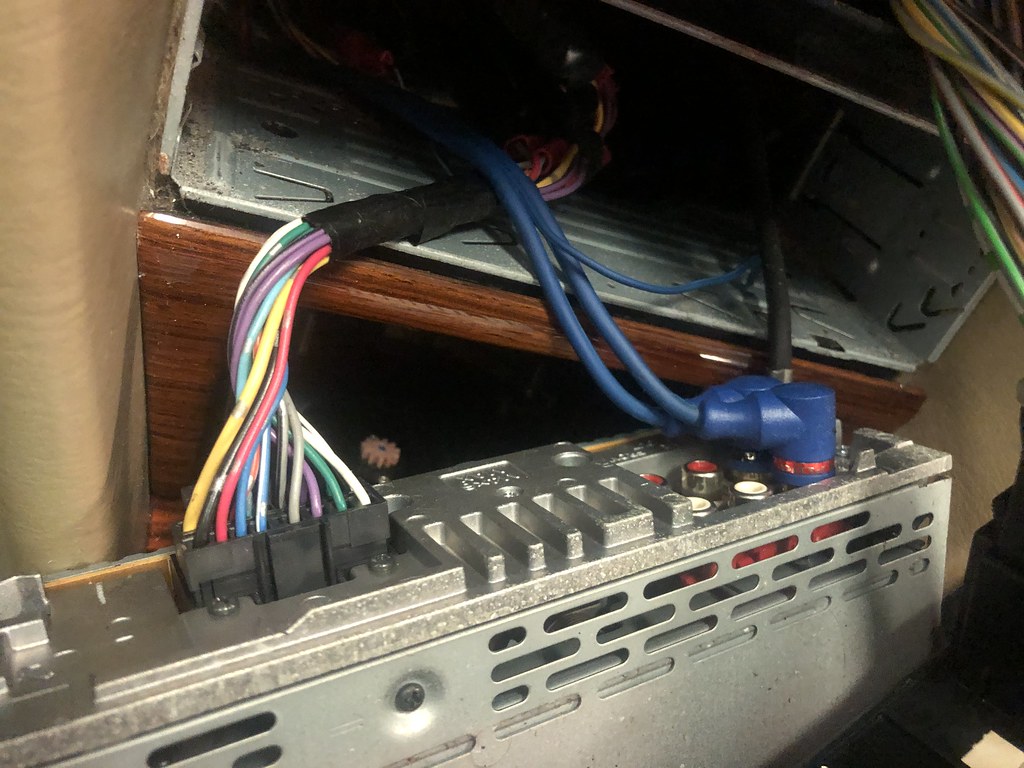
My next step was to remove the old Sony from the car. The previous owner had left the DIN tools for the radio, so I was able to get it removed fairly easily. On removing the old radio, I was quite shocked to see a set of plugs for a subwoofer in the back of the Sony. I was very confident that there wasn’t a subwoofer installed in the car, let alone a working subwoofer.
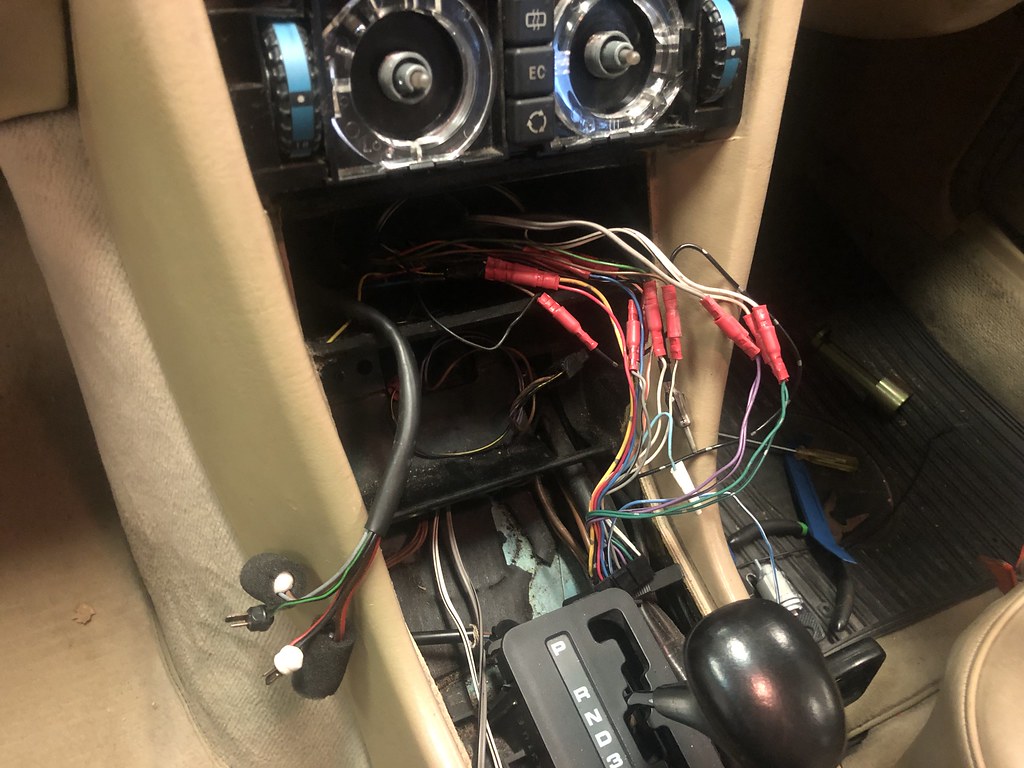
It wasn’t clear where those cables went. before I went any further, I needed to trace them and see. I didn’t want to leave a rats nest of old cables in the car, if I could avoid it. I first removed the ashtray and the centre console wood. They didn’t disappear into there. They seemed to go to the left, so I started pulling up the carpets on the passengers side of the car. Sure enough, I found the cables cut off in the passengers side foot well.
I guess a previous owner had a subwoofer installed at some point. The installer of the Sony Xplod just didn’t bother to trace the cables, and just plugged them into the back of it. I’ve now removed them. I also saw the remains of an early 2000s phone charger in the centre console, so will need to trace that and remove it too.
After that, I got to looking at how the Xplod was wired in. There is little trace of the old Becker plugs for the radio, but there are some remains of the speaker cables. They were not connected to anything, so I don’t think they are in use anymore. The connectors will be quite useful to me regardless. For my W124 Becker install, I needed to verify the purpose of each wire in the back of the Sony. The Sony manual didn’t include any information on that, just useless info about not scratching your CDs.
I’ll do some research on the internet to get the wiring info for the Sony, so I can wire in the Becker plug next. While I was there, I also wanted to swap out the hazard light switch. It was jammed in the off position and didn’t work at all. I removed the upper wood trim to get to those switches. To remove it, there were two small screws at the bottom, above the radio. Then the two large knobs hold it on.
 From there, the frame around the switches can be removed with a Philips head screwdriver. Once that frame is removed, the switches just pull off. I had a spare hazard light switch in my box of Mercedes switches, so I was able to quickly swap it over, and successfully test it’s operation.
 In the next step of my W124 Becker radio install, I want to sort out the plugs for the Becker radio – i.e. the speaker plugs and the power plug. That will allow me to test the radio in the car. Then I can install the FM injector. I’m taking the car on a short road trip at the end of the month, so my goal is to get it done before then.
Continued in part 2.


This is part of a three part series:
Part 1: https://www.classicjalopy.com/2023/03/w124-becker-radio-install-part-1/
Part 2: https://www.classicjalopy.com/2023/03/w124-becker-radio-install-part-2/
Part 3: https://www.classicjalopy.com/2023/03/w124-becker-radio-install-part-3/
[…] W124 Becker radio install – part 1 […]
[…] its taken me a bit longer to sort out the radio for the car. Based on that, I started on my 560SEC and then moved to my 300TE. I’ve been pretty happy with these installs, so now it was […]