
W124 Becker radio install – part 2
Yesterday, I started installing a Becker 1402 in my 1990 300TE. This was the radio it was sold with, and the same radio I have in my 1987 560SEC. I had removed the old Sony and inspected the wires, plus fixed my broken Hazard light switch.
This morning I looked up the wiring colours for the Sony online. The wiring in the car has been ‘modified’ by various radio installers over the years, so starting with the Sony wires was a good place to start. As outlined the operation instructions, the Becker 1402 wiring harness has four wires going into the custom plug. These are: Ground, Switched Power, Illumination & Constant power.
Before I wired in the Becker harness, I also needed to provide some connections for other accessories. I wanted to add in USB charging ports and the iTranzit BLU FM injector. As the Becker will use a lot less power than the modern Sony, I wasn’t too worried about the power draw. My new setup should use less power overall than the old one. I’m already charging my phone from the cigarette lighter which comes off the same circuit.
I planned to let the Becker 1402’s antenna trigger turn on the iTranzit BLU, using a relay. This is the same setup I used on the 560EC. The iTranzit BLU uses very little power, but I didn’t want to chance overloading it. Thus, the antenna trigger is connected to a rely, which in turn turns on the power for both the iTranzit BLU and the power antenna.
From the ground wire, I needed connections for the Becker, the iTranzit BLU, the relay and the USB ports. For the Switched power, I needed a wire for the Becker and one for the USB charging ports. The illumination just went into the Becker, but the Constant power was needed for both the Becker and the relay. As I wired the Becker connectors in, I just added a few additional wires for these other accessories.

There was a very handy spot in front of the shift lever assembly that was a good fit for the iTranzit BLU. This was close enough to the Becker 1402 for the antenna connections, and out of the way. At least on the W126, this is where a control box for the airbag goes, should the car be so equipped. It’s probably the same on the W124. I was able to push its wires up behind the ashtray. The control button will go out the side of the centre console, as will the handsfree microphone. The relay that powers it will just be taped to the back of the Becker.
To get the USB plugs out a small gap between the carpet and the centre console, I taped them to a now removed mobile phone connector, so I could pull them through. As mentioned above, this just wired into switched power, as I didn’t want a small current draw when the car was not being used.

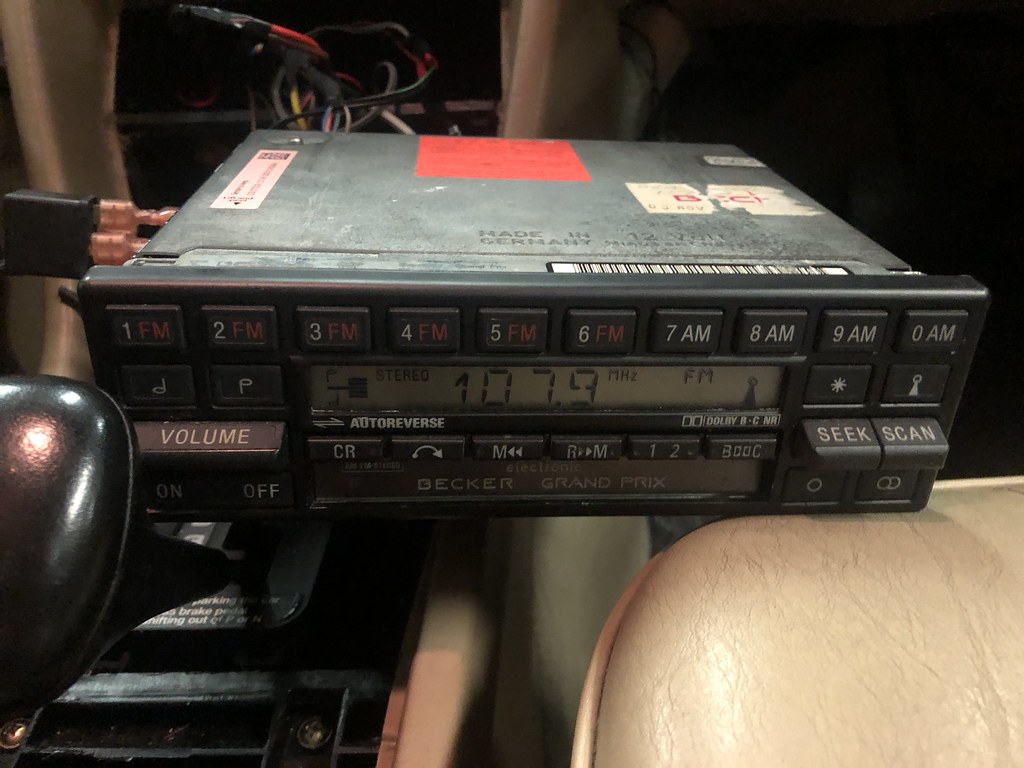
I was now ready to do my first power on test. Before I started with the speaker wires, I plugged in the factory Becker plugs that were still floating around in behind the radio. As expected, they did nothing and are no longer in use. On the other hand I had no other issues with my wiring. The Becker 1402 powered up as it should. It accepted the security code. The relay trigged both the antenna and the iTranzit BLU. The illumination worked as it should.
After this test I cut off the now disconnected Becker speaker plugs, as I wanted to use them for the radio. Since the Becker is a 2x25W radio, I needed to splice both left speakers together and both right speakers together. I don’t plan to re-wire the fader. This is the same setup I used when installing the Becker in a friend’s 450SE recently. Essentially the left front positive is joined up to the left rear positive, and the left front negative to the left rear negative. The same goes for the right side.
Before I did this, I first checked the speaker wires were correct. This can be done with an AA battery. Simply hold the positive wire to the top, and the negative wire to the bottom, and the speaker should make some static. Its a quick and simple way to check the speaker wires are as you thought. Its only 1.5 volts, so the wires can be held on by hand. All four speakers worked, including the front left that hadn’t been working before. Probably a connection issue to the Sony.
Once I had the speaker wires connected properly, it was time to plug them into the back of the Becker 1402 and test the sound. It sounded great. Perhaps some confirmation bias, but much better than the more modern Sony. Both AM and FM worked well. On the other hand, the iTranzit BLU wasn’t playing music as I thought it should. On closer examination of its manual, the status light was blinking three times. This means its connected, but needs resetting. Holding the action button down for six seconds took care of that. Soon I had Sherbet’s Howzat playing through the speakers of the 300TE!
This was a good place to stop. Everything seemed to be working quite well. My task next time is to tidy up the wiring and actually put the Becker 1402 into the dash where it belongs. This is covered in part 3.


This is part of a three part series:
Part 1: https://www.classicjalopy.com/2023/03/w124-becker-radio-install-part-1/
Part 2: https://www.classicjalopy.com/2023/03/w124-becker-radio-install-part-2/
Part 3: https://www.classicjalopy.com/2023/03/w124-becker-radio-install-part-3/