
107 under bonnet insulation
The under bonnet insulation was starting to reach the end of its use by date. Bits of it in the air filter were a pretty good indicator of this. I’m not sure how long it had been on, but it pre dated my ownership of the car. Looking more carefully, I could see the main insulation mat, which was falling apart. However, I could also see traces of where a smaller insulation mat had been behind the bracing section near the rear of the bonnet. That one was mostly gone, but a few chunks remained. It looked like it was not replaced when the main 107 under bonnet insulation was done last time.
All the main vendors listed the main insulation, but I guess everyone forgets the small thin one, as it didn’t show up on all the usual sites. Looking up the part number (A107 880 00 97) I was able to order it as a genuine Mercedes-Benz part out of the USA. For reference, the part number of the main under bonnet insulation is A107 682 03 26.

I’ve now done this job on the 126 saloon and coupe, as well as the 123. Those cars are quite easy. The 107 is much more of a pain. For starters, the bonnet doesn’t open nearly as much, and there is no service position. The secondary insulation mat is really hard to see what you are doing with the bonnet attached. It would be a doddle with the bonnet removed. It is still possible to do with one person.
I used my normal method I’ve outlined a few times now. First placing an old bedsheet over the engine and scraping off the old 107 under bonnet insulation. This was quite easy as it had crumbled so much. I had it off pretty quickly. I focused on the main insulation mat first.
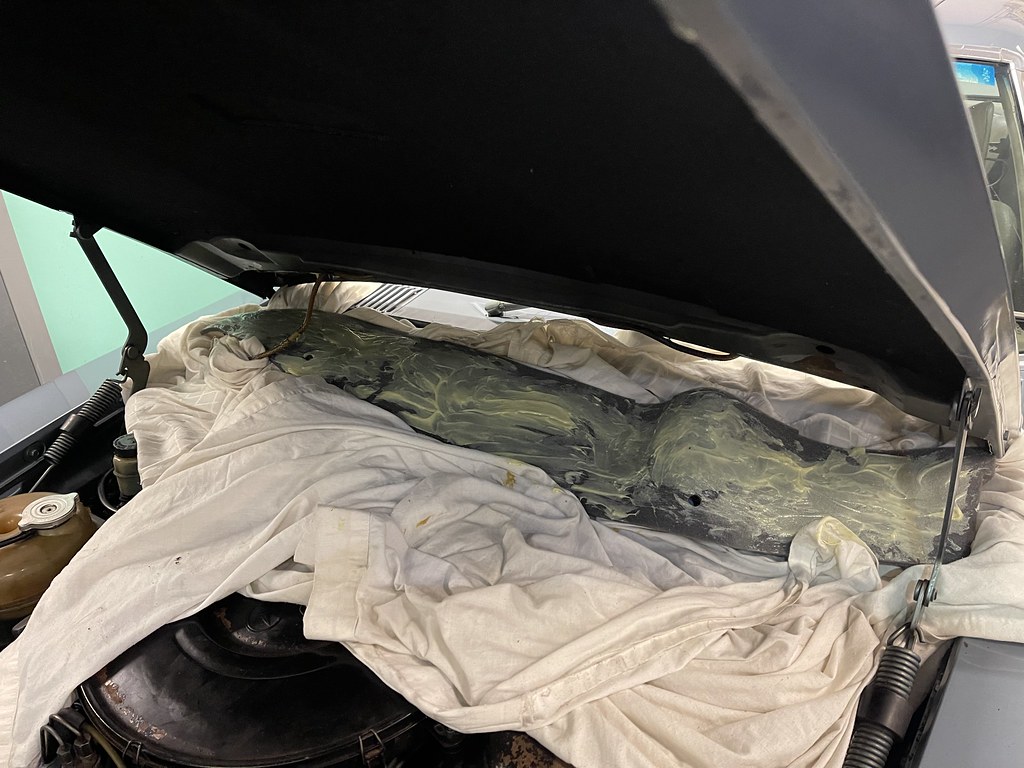
To glue the pad, I used the same product as previously. Seallys quick grip vertical gel. The main 107 under bonnet insulation required one tin. This is because the 107 bonnet is quite narrow. I forgot to take photos of this part, but its the same as the other articles linked above.

The only mistake I made here was not cleaning off the bedsheet I was using sufficiently – bits of debris stuck to the bottom of the new mat, and I had to brush them all off. It only took a few minutes, so it really wasn’t a big deal.
At that point, since I had used a whole can of the Seallys glue, I stopped and waited for the 123 under bonnet insulation to arrive. I didn’t want to open a whole tin and just use a little for the smaller secondary insulation mat. About a week or so later, I then moved to the 123 and completed that job, using one and a half tins of the Seally’s product.

To do the secondary mat, I had to try and get the sheet right in behind the rear edge of the bonnet to scrape away the rest of the old mat. I was mostly doing it my feel and later missed a little when applying the glue. Before the secondary insulation can be attached, the windscreen washer jets must be disconnected. The secondary mat has little holes for the connections to go.
The process of applying the glue and pad to this area was the same as the others, just harder because its difficult to see. I found that once I had it in place, closing the bonnet was the best way of pressing the secondary insulation pad to the bonnet. The secondary insulation pad is an interesting design as it has a raised section that seems to seal against the top of the firewall.
 The new pad looks a lot better than previously. I’m not sure how essential the secondary one is, but its obviously there for a reason. In any case, I hope this lasts another 20 years.


