
I am currently in the process of installing a period correct Becker Radio in my 560SEC. In part 2, I had the system up and running. The final task was to tidy up the installation and re-install all the trim.
The first step was to properly organize and tidy up the wiring. I wanted a neat install, and to hide all the wires out of the way. The Alpine amplifier I am using is small enough I could tuck it in with some other control modules in the passengers foot well.
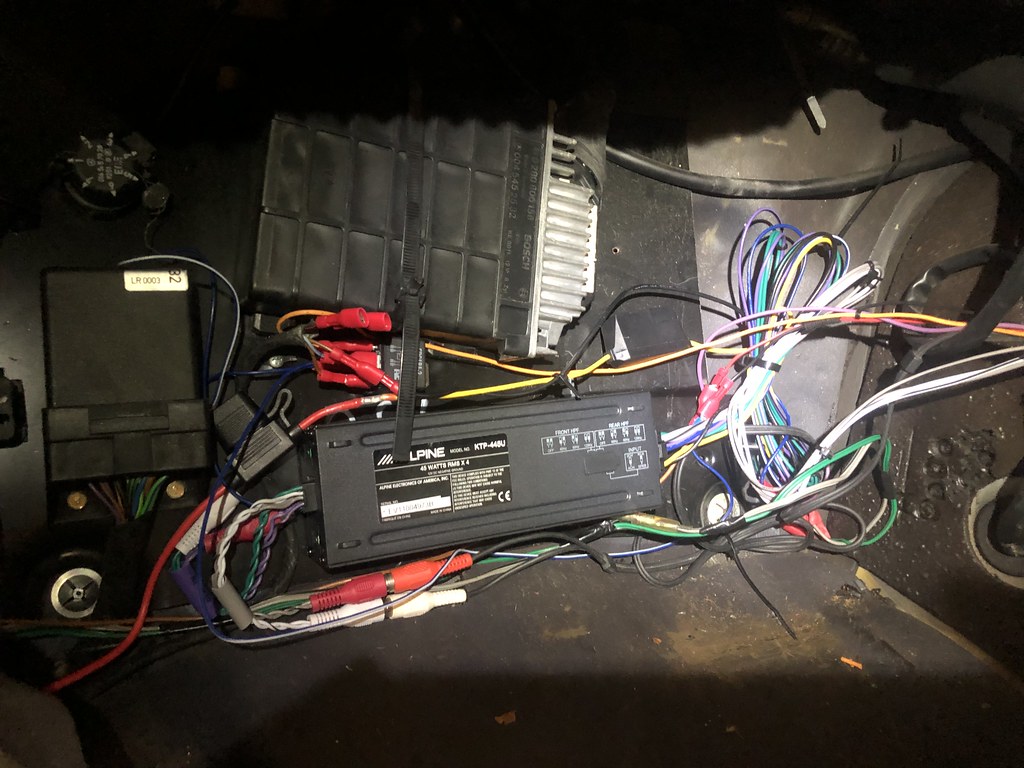 I mounted the amp with the back face up so I could adjust the dip switches if required. I didn’t have a great way of mounting it without drilling, so I used some stick on Velcro. Before I re-installed the under dash panels, I had two further tests to perform. The first was to check the hands free calling feature. Last time I was testing the system, it was after 11PM, so it wasn’t really appropriate to start calling people. I’m glad I did, as the previous microphone from the Alpine head unit did not work with the Tranzit BLU.
The Tranzit BLU comes with its own microphone, but I had planned to use the Alpine mic as it was already installed. That meant I needed to remove the radio to feed the cable for the microphone to the drivers side of the car. In doing that, I discovered a problem. I had cable tied the RCA cable to keep it away, so when I tried to pull out the radio there was no slack in the cable.
Something had to give, and that was to pull the line out module off the back of the radio. It has a screw holding it on, but only one. That mean it levered outwards and bent one of the pins. Luckily I was able to remove the module, bend the pin back, and re-install it. It also meant I had to cut off all my cable ties, add more slack and then re-cable tie that section of the install.
My second test was to try the high pass filter for the rear speakers. In the end I set it at 60Hz. With that done, I was able to start putting things back.
The plastic retaining screws for the cover for these control boxes were long lost on my car. Luckily, the parts car had one of them which I used. One of the connectors for the Tranzit BLU was loose, so I sniped it off and replaced it.
 The two side panels were quite easy to re-install. The one against the console just slots into place. The panel against the side of the car slides in from the rear. It is then further secured by the screws for the bonnet release.
The hardest panel to re-install was the passengers side under dash panel. Getting that back into place was a real pain. I set it up so the USB ports were just poking out between that panel and the console. That leaves them accessible for my phone in its windscreen mounted phone holder.
On the drivers side, the under dash panel was easier to use. I noticed when putting it on the ‘scoop air’ vacuum pod was damaged and needs replacement. These are now NLA, but diaphragms are available from aftermarket sources. That will be a job for another day. let the control button just poke out on the opposite side to the USB ports. I also had the microphone coming out on the other side of the steering wheel.
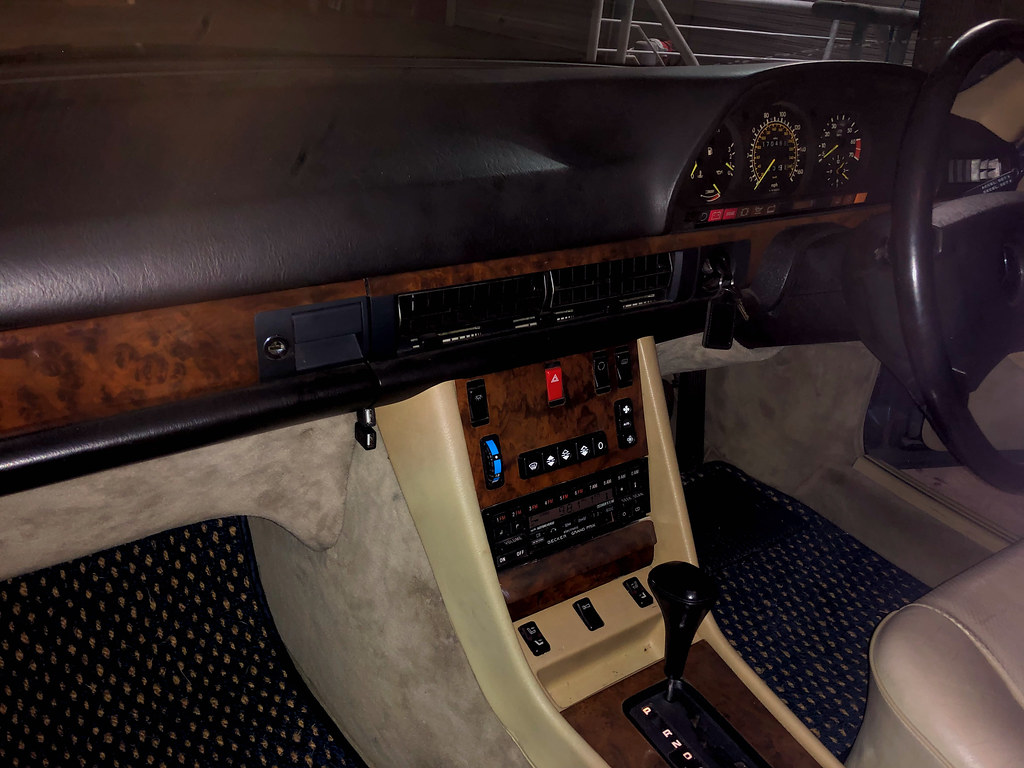 Once I had the radio installed, I took the car on a test drive to see how it all worked. Overall I am really happy with my Becker radio install. Now I have the Becker installed, its obvious how out of place the modern Alpine head unit looked. The Tranzit BLU is a nice way of bringing a period radio into the 21st century. I prefer it to modifying the radio to support Bluetooth. I plan to keep this car for the long term – and who knows how long Bluetooth will be the primary technology used for this type of streaming. The sound is very good through the amplifier and I was able to adjust the bass/treble controls on the Becker 1402 to my liking.
Through my testing, I have found two issues I will need to address. Firstly, the USB ports are now no longer working. I suspect re-installing the under dash panel pulled out a connector. This is a pain because it was the hardest one to get in. Secondly, the Tranzit BLU is not powering on when the ignition key is in the accessory position. It only works in start and run (i.e. position 2 and 3). I neglected to do testing in the accessory position which was a bit of a miss. The problem is likely that I have a pin in the wrong spot connecting into the X30 power block. I have to take the dash panel out anyway to fix the USB ports, so I will look at this at the same time.
In a totally objective view, I’ve spent hundreds of dollars on my Becker radio install to have less functionality than before. I don’t see it that way though. The Becker works really well in the dash of the W126 and with my improvements, I have a system I really like.
I’m going to use this system for a while before I move onto my next Becker radio install and upgrade – on my 450SLC.


This is part of an series of articles on installing the Becker Mexico cassette in my 560SEC:
1) Procuring and testing the radio: https://www.classicjalopy.com/2022/07/planning-becker-radio-installs/
2) Testing the line out module: https://www.classicjalopy.com/2022/08/connecting-the-becker-line-out-module-to-a-modern-amplifier/
3) Locating the X30 power block on RHD cars: https://www.classicjalopy.com/2022/09/locating-the-w126-x30-power-block-on-rhd-cars/
4) Install Part 1: https://www.classicjalopy.com/2022/09/w126-becker-radio-install-part-1/
5) Install Part 2: https://www.classicjalopy.com/2022/09/w126-becker-radio-install-part-2/
6) Install Part 3: https://www.classicjalopy.com/2022/09/w126-becker-radio-install-part-3/
7) Install Part 4: https://www.classicjalopy.com/2022/10/w126-becker-radio-install-part-4/
[…] W126 Becker Radio install – part 3 […]