| Last night was the MBCNSW May night drive. This drive was a little different to what we normally do. Instead of a longer drive on semi-rural twisty roads, this one was shorter and far closer to the city. The genesis of this drive came from remembering how peaceful it was up at North Head in the evening. The views back to the city and across the harbour are amazing. I thought it would be a good place to go to take some photos of all the older cars lined up against the view. The original idea was to start at Shelly Beach, drive up to North Head for the view, then across to Dobroyd Head for a second perspective, before taking Wakehurst Parkway into Brookvale. 
The issue came the month before, when I went up to North head myself. Instead of being able to drive up there as usual, at some point the government had installed a locked gate. I had seen some tyre marks up there before, so I assume that there were people going up there to do burnouts from time to time. The gate closed at 6pm, way too early for the night drive. The gate is such a knee jerk reaction to a problem. It doesn’t stop the idiots doing the burnouts, it just moves them somewhere else. What it does do is penalize the people who were enjoying the park when it was quiet and peaceful. During the day there is a busy cafe up there. The better response would have been some police patrols to actually penalize the people doing the wrong thing. But the police are far too busy writing tickets to drivers doing 55km/h in a 50 zone. 
The idiotic gate presented a problem. While taking a set of bolt cutters was a preferable solution, that was hardly ideal for a car club run. Therefore I had to change the route. I did a few drives around the area, but there was nowhere else that had great views and room for 10 or so cars. In the end I changed the starting point to McKillop reserve near Harbord Diggers, and took a different route to Dobroyd Head. Dobroyd Head became the main stopping point, and then the rest of the route via Wakehurst Parkway to Brookvale McDonalds was all the same. 
On the night it was a lovely autumn evening. I took my 250SE and opened the roof for the drive. We had a good turn out for the drive, with two W108s, three W124s, a W126 and an XJ6. It was a perfect night for a drive and we all enjoyed the view from Dobroyd Head and the drive back to Brookvale. Even having to give up North Head, it was still a good drive. 
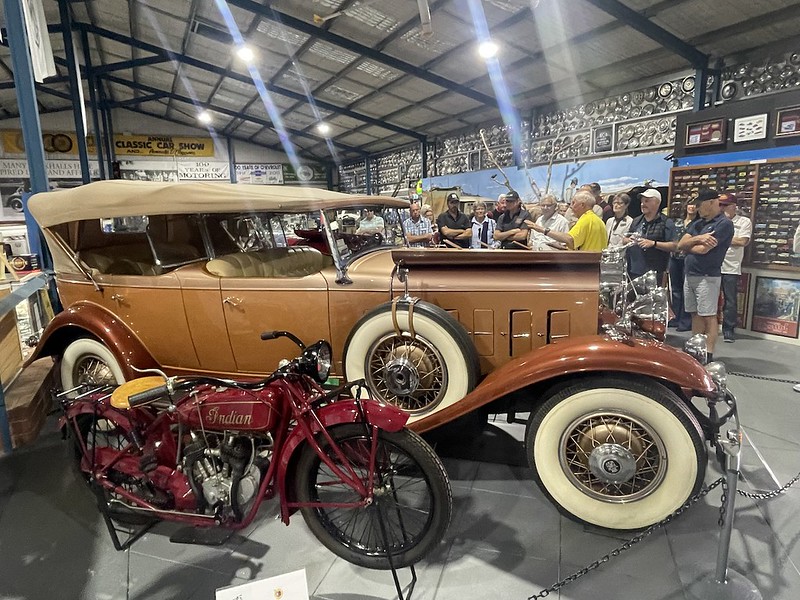
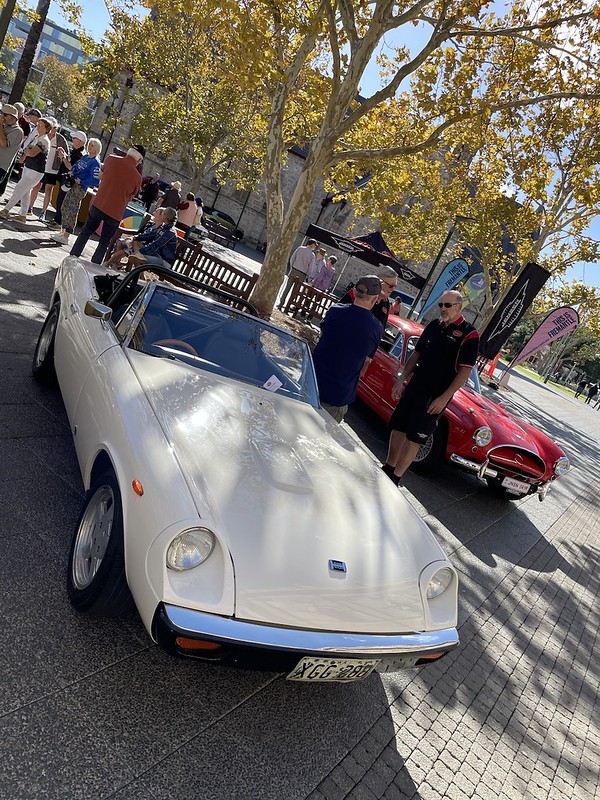
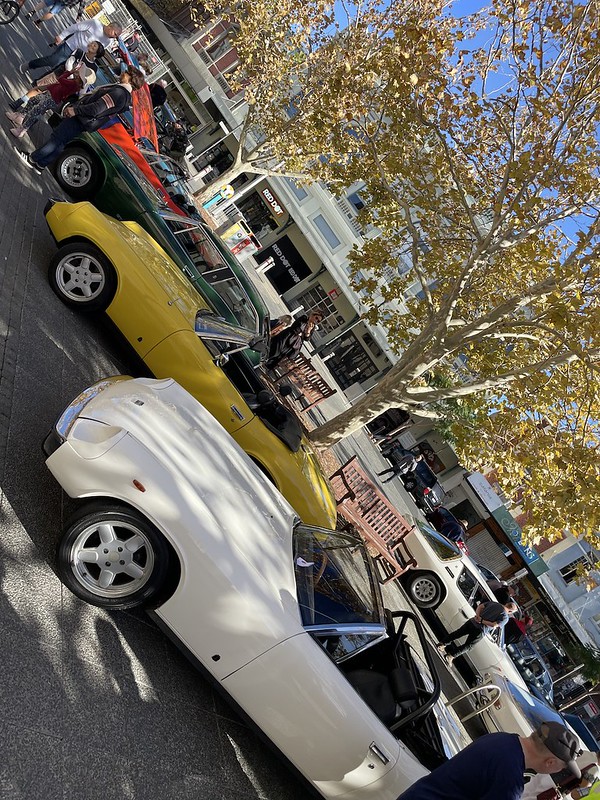
This morning I woke up early and so decided to head to a cars and coffee event. I hadn’t been to one in a while, and it looked like a lovely Autumn day in Sydney. The event on this weekend was the one in Centennial Park. Last time I attended this one was back in mid 2022. This event has moved around a bit as the eastern suburbs are not friendly to car events. When I got there, I found the location had moved again. It was still in the park, but it is now near the Spruce Goose Diner, not the Shakespeare statue. A quick call to a friend who is a regular clued me into the new location. I think the old location was better, but I suspect the organizers didn’t have a choice in this matter. The new location is quite small and fills up very fast, with cars then overflowing onto the ring road and parking with the regular SUVs. The mix of this event is quite different to the other ones I attend, There are more exotics, especially 911s, and more modern performance cars. However, despite a new McLaren, the car getting the most attention was the Ferrari Testarossa. It looked great in dark blue, showing that Ferrari’s don’t have to be bright red. There was also a nice Lamborghini Uracco and a Maserati Khamsin. 
I took my 1981 240D, not for any particular reason than it was in the garage at home. Its a good car for driving into the crowded eastern suburbs. The only other Mercedes was a 380SL. I ended up [parking next to a Volvo 240, probably fitting given it has similar attribute to the W123. The new location is a far more busy thoroughfare than the old one. Generally most people were pretty easy going, but it was interesting to contrast the behaviour of the runners, pedestrians and the drivers with that of the cyclists. I was only there for twenty minutes and I witnessed two cyclists getting quite hot under the collar for for being slightly delayed by people walking around looking at the cars. While this isn’t my favourite of the Sydney cars and coffee events, it was a lovely morning to get out for a drive and look at a new nice cars. I just got my 240D back from having the motor mounts changed. When I purchased the 240D, the motor mounts were one of the few obvious things that needed attending to on the car. They looked pretty bad and the engine was shaking at idle. 
On a W123 or W126, normally I would go with the Lemforder motor mounts, which are excellent. I couldn’t find any of those for sale. Generally I avoid Meyle parts as I find their quality and longevity questionable. However, I had read a couple of good reviews of their HD parts. Given 240Ds have a reputation of being hard on motor mounts, I thought I would give them a try. 
At the same time, I bought a new transmission mount, plus and engine shock and fitting kit. Interestingly, while the 300D has a pair of engine shocks like a V8, the 240D has a single one. When the Meyle mounts arrived, they looked quite substantial, and quite different form the regular Meyle mounts. I didn’t inspect the transmission mount, but it seemed to make sense to do them all at the same time. 
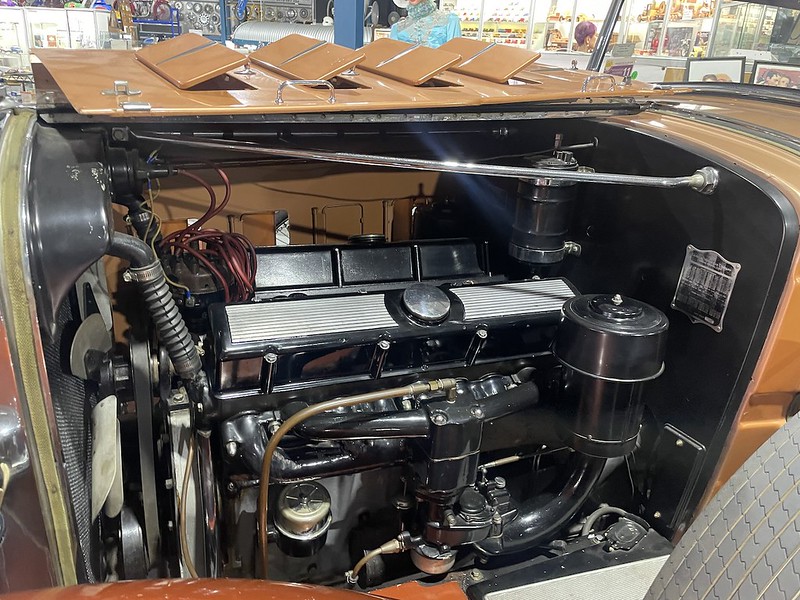
Now I have the car back, my initial feeling is that these mounts are very hard, and probably a bit too hard. I expect they will settle a little, which may make them a bit better. They are an improvement on the original mounts, but are a little harsh, particularly when the engine is cold. While the car was in, I also had the shift bushings and thermostat changed. I would normally do the shift bushings myself, with the Kent Bergsma tool, but my hoist is currently broken. The car had been running a bit hotter than I would like, so the thermostat seemed like an obvious thing to do. The shift bushings made a big difference, and so far the thermostat seems to have helped somewhat. The engine still gets quite warm going up a steep hill, but it now cools off a bit when not under load. I’ll keep an eye on this. I was able to verify that the oil cooler is working. When I parked the car after driving today, the oil cooler was warm to the touch. I’ve been really enjoying this car. The W123 sedan is such a great car, especially when compared to how cheap they are to buy. The under bonnet insulation was starting to reach the end of its use by date. Bits of it in the air filter were a pretty good indicator of this. I’m not sure how long it had been on, but it pre dated my ownership of the car. Looking more carefully, I could see the main insulation mat, which was falling apart. However, I could also see traces of where a smaller insulation mat had been behind the bracing section near the rear of the bonnet. That one was mostly gone, but a few chunks remained. It looked like it was not replaced when the main 107 under bonnet insulation was done last time. All the main vendors listed the main insulation, but I guess everyone forgets the small thin one, as it didn’t show up on all the usual sites. Looking up the part number (A107 880 00 97) I was able to order it as a genuine Mercedes-Benz part out of the USA. For reference, the part number of the main under bonnet insulation is A107 682 03 26. 
I’ve now done this job on the 126 saloon and coupe, as well as the 123. Those cars are quite easy. The 107 is much more of a pain. For starters, the bonnet doesn’t open nearly as much, and there is no service position. The secondary insulation mat is really hard to see what you are doing with the bonnet attached. It would be a doddle with the bonnet removed. It is still possible to do with one person. I used my normal method I’ve outlined a few times now. First placing an old bedsheet over the engine and scraping off the old 107 under bonnet insulation. This was quite easy as it had crumbled so much. I had it off pretty quickly. I focused on the main insulation mat first. To glue the pad, I used the same product as previously. Seallys quick grip vertical gel. The main 107 under bonnet insulation required one tin. This is because the 107 bonnet is quite narrow. I forgot to take photos of this part, but its the same as the other articles linked above. 
The only mistake I made here was not cleaning off the bedsheet I was using sufficiently – bits of debris stuck to the bottom of the new mat, and I had to brush them all off. It only took a few minutes, so it really wasn’t a big deal. At that point, since I had used a whole can of the Seallys glue, I stopped and waited for the 123 under bonnet insulation to arrive. I didn’t want to open a whole tin and just use a little for the smaller secondary insulation mat. About a week or so later, I then moved to the 123 and completed that job, using one and a half tins of the Seally’s product. 
To do the secondary mat, I had to try and get the sheet right in behind the rear edge of the bonnet to scrape away the rest of the old mat. I was mostly doing it my feel and later missed a little when applying the glue. Before the secondary insulation can be attached, the windscreen washer jets must be disconnected. The secondary mat has little holes for the connections to go. 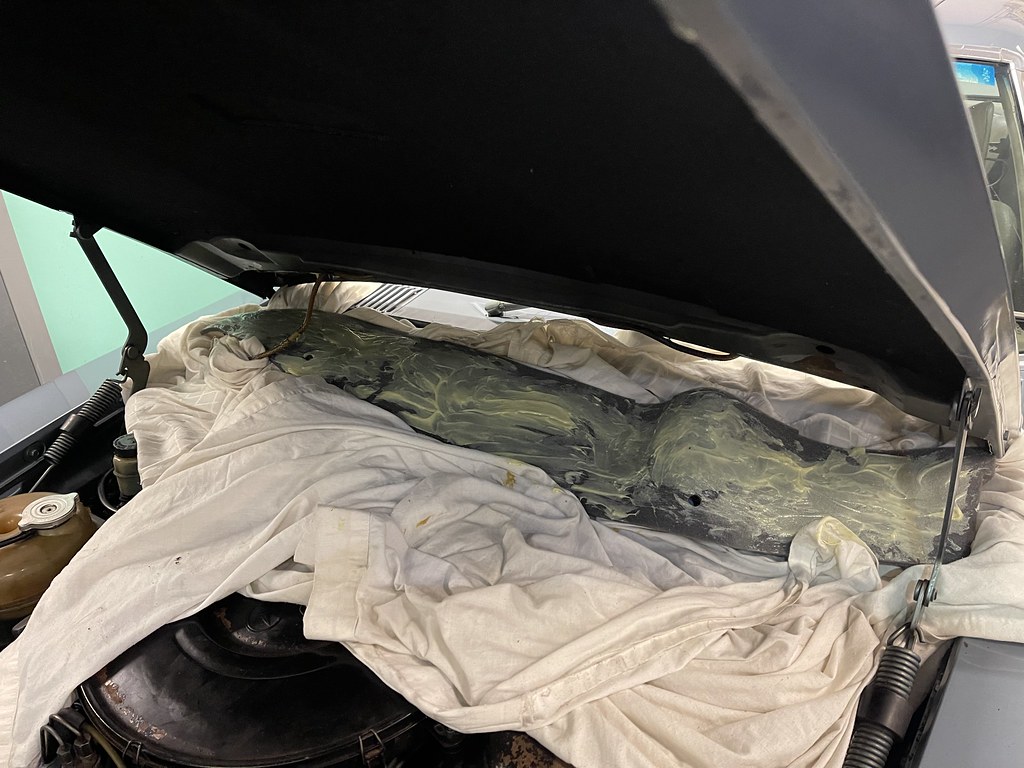
The process of applying the glue and pad to this area was the same as the others, just harder because its difficult to see. I found that once I had it in place, closing the bonnet was the best way of pressing the secondary insulation pad to the bonnet. The secondary insulation pad is an interesting design as it has a raised section that seems to seal against the top of the firewall.  The new pad looks a lot better than previously. I’m not sure how essential the secondary one is, but its obviously there for a reason. In any case, I hope this lasts another 20 years. The new pad looks a lot better than previously. I’m not sure how essential the secondary one is, but its obviously there for a reason. In any case, I hope this lasts another 20 years.
The under bonnet insulation on my W123 240D had started to crumble on the edges. While it had only just started happening, it also appeared that the car didn’t have a proper insulation mat. I’m not sure if it was an older aftermarket option, or something cut to size but it looked like some thin light coloured foam. Since I was doing this job on the 450SLC, I figure it was a good time to get both done at the same time. This insulation is quite important. Not only does it reduce noise, but it does protect the paint. My old 230E crazing in the paint above the hot engine from driving a few years with no insulation. The car wasn’t even that old back then. The paint on this car is nice and original and I don’t want to damage it. I used the same method I used back 5 years ago on my W126 300SE. To start with, I used a plastic scraper to remove as much of the old one as I could.  I found for the bigger lumps, it was easier to have the bonnet in the regular position. Once I got most of it off, I then moved the bonnet into the service position and moved the sheet up. This is the longest part of the job. It doesn’t matter if all the old glue doesn’t come off, but its important there are not any loose bits. I found for the bigger lumps, it was easier to have the bonnet in the regular position. Once I got most of it off, I then moved the bonnet into the service position and moved the sheet up. This is the longest part of the job. It doesn’t matter if all the old glue doesn’t come off, but its important there are not any loose bits.
Once I had the old one cleaned up, It was time to apply the adhesive. As with last time, I used Seallys Kwik Grip Vertical Gel. It has the right temperature rating and is still holding the insulation on my 560SEC and my old 300SE perfectly, five years later. I find its easiest to apply it with my fingers using 7mm gloves. The W123 requires a little more than a can and a half. I took the opportunity to change gloves when I opened the second can. It seems to eat into the gloves if you don’t.  The Seallys product suggests waiting 20-40 minutes before mating the two surfaces. I prefer to do it sooner, as it gives me a bit more ability to move things if I don’t get it quite right first go. For example, in this case, I didn’t have it aligned properly against the leading edge of the bonnet, so I was able to peel it back and re-apply. The Seallys product suggests waiting 20-40 minutes before mating the two surfaces. I prefer to do it sooner, as it gives me a bit more ability to move things if I don’t get it quite right first go. For example, in this case, I didn’t have it aligned properly against the leading edge of the bonnet, so I was able to peel it back and re-apply.
I also use gloves to apply the W123 under bonnet insulation. That way, if I get a bit of glue on my fingers, I change gloves and I don’t spread the glue around. I think I must have used 5-6 pairs of gloves to get the job done. When I got a bit of glue on the paint, the can suggested white spirit to remove it. I didn’t have that, but hand sanitizer worked great. As with earlier, I find it easier to start with the bonnet in the regular position. Once the pad is generally in the right place, move to the service position to work on the lower edge. 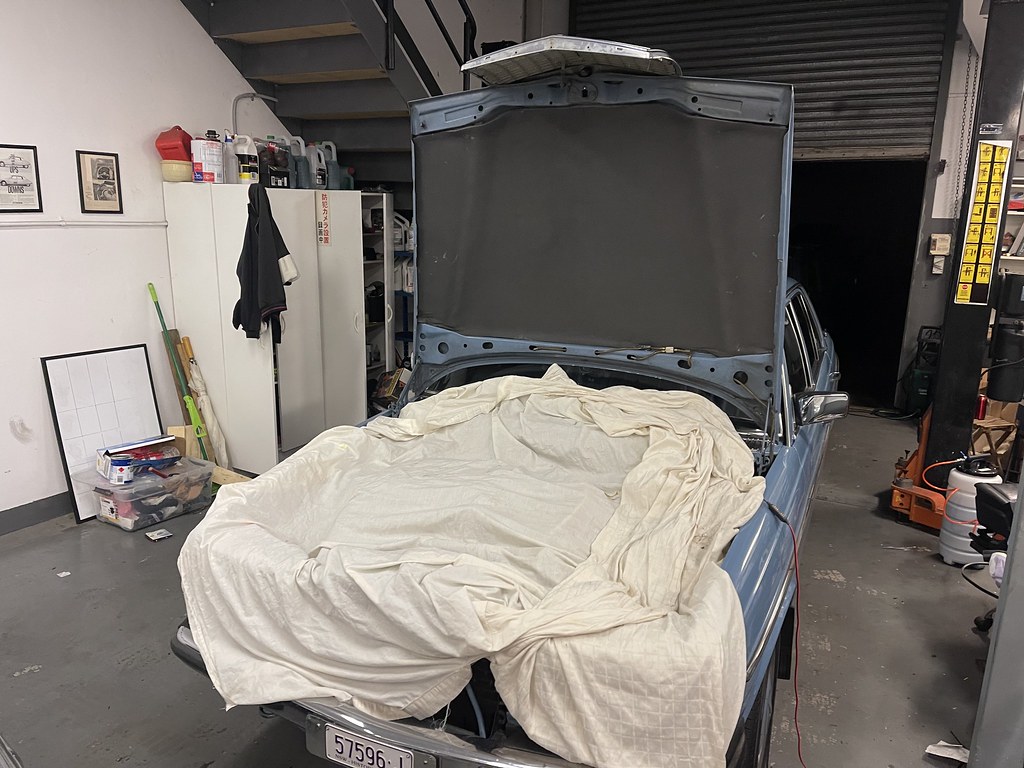 Once that was done, I lowered it again to tuck in the leading edge. The whole job takes 1-2 hours depending on how long is needed to remove the old insulation mat. I find this job pretty easy to do myself, but that maybe because I am tall and can reach most of the bonnet. Once that was done, I lowered it again to tuck in the leading edge. The whole job takes 1-2 hours depending on how long is needed to remove the old insulation mat. I find this job pretty easy to do myself, but that maybe because I am tall and can reach most of the bonnet.
Doing the job at the same time as the 450SLC resulted in three cans of the Seallys adhesive across both cars. While I was there, I also replaced the two clips for the sun visors so they were not flopping around. They are still available new from Mercedes-Benz. They are the W126 part number that supports a light in the mirror. Not as cheap as they used to be, but still available in the colour I needed. Like a lot of modern cars, the S211 E350 my wife drives has a ‘shark fin’ antenna on the roof. There are generally maintenance free, in contrast with telescopic power antennas. However, in our case, when the antenna was broken after hitting a garage door, the fix was not obvious. The proper fix would be to replace the antenna with a new Mercedes-Benz unit. However, to do this, the headlining needs to come down to remove it. Doing a bit of research on the forums, this looked like a big job.  I was concerned after driving around like this for a while, that either water would get into the cabin, or damage the antenna to a point it would no longer tune stations. My wife asked our mechanic when she dropped off the car for a service, and he suggested a large shark fin cover that sticks on. I thought this was a great idea, so ordered one from Ali-Express that was large enough to totally contain the remains of the S211 antenna inside it. This cover was cheap, but took over three months to arrive. I was concerned after driving around like this for a while, that either water would get into the cabin, or damage the antenna to a point it would no longer tune stations. My wife asked our mechanic when she dropped off the car for a service, and he suggested a large shark fin cover that sticks on. I thought this was a great idea, so ordered one from Ali-Express that was large enough to totally contain the remains of the S211 antenna inside it. This cover was cheap, but took over three months to arrive.
Next I went to Autobarn and bought a rattle can of ‘Flint Grey’ and some plastic primer. The plastic primer didn’t seem to want to adhere all that well to the ali-express antenna. After a few light coats, my daughter and I had even coverage, although it wasn’t exactly smooth. 
We then applied the Flint Grey top coat to our new s211 Antenna. It wasn’t the smoothest job, and for a better job I could have wet sanded it, and applied clear coat. The paint on the S211 is only average, so I was just looking for something that didn’t look terrible or let water into the antenna. The new antenna came with some double sided tape to install it. While the front part seemed to adhere quite well, the sides and rear didn’t seem as good a fit. I gave it 50/50 chance of staying on. I was pessimistic, as a few weeks later its still there even after driving in storms and rain. 
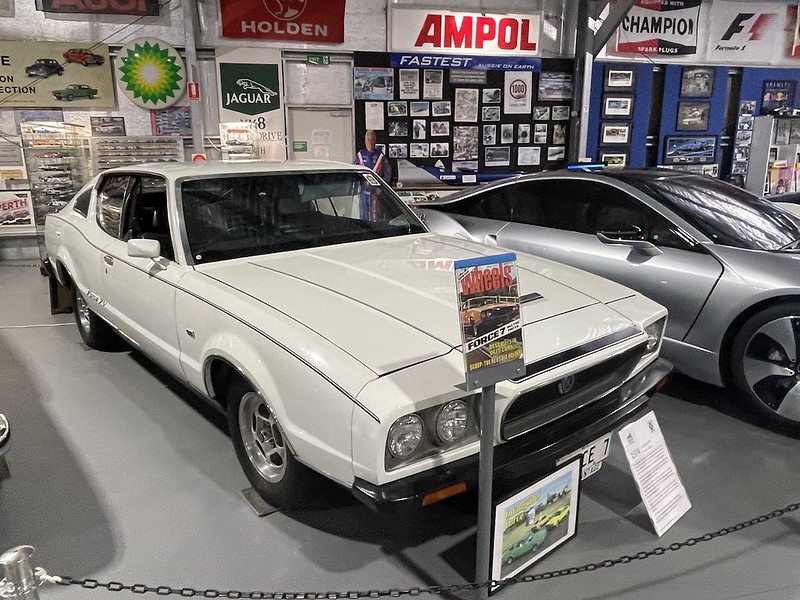
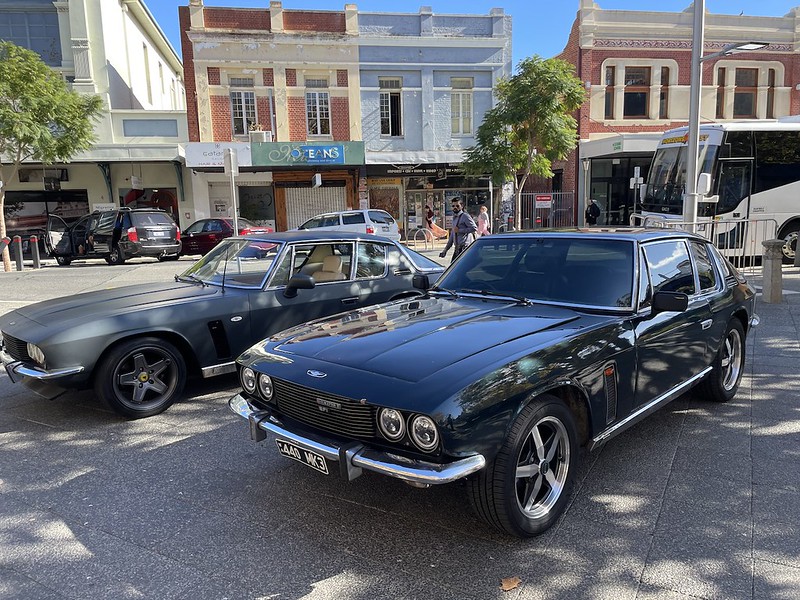
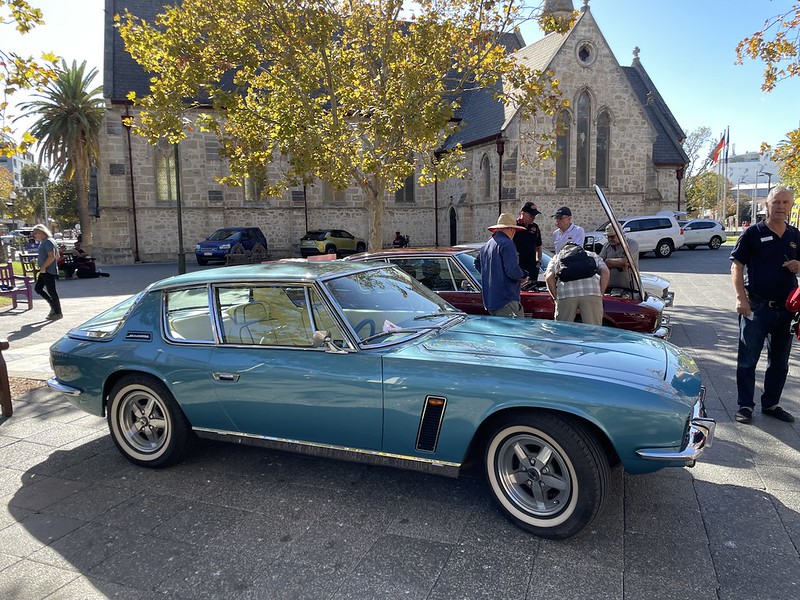
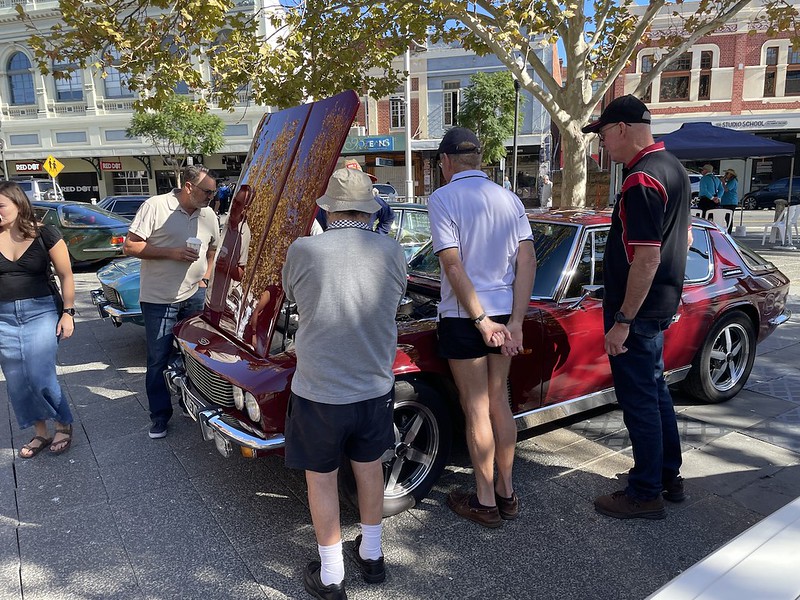
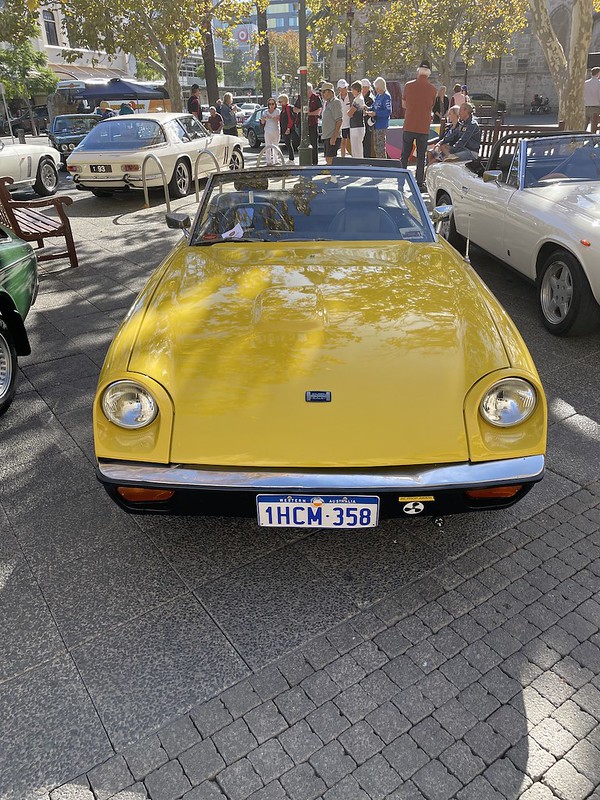
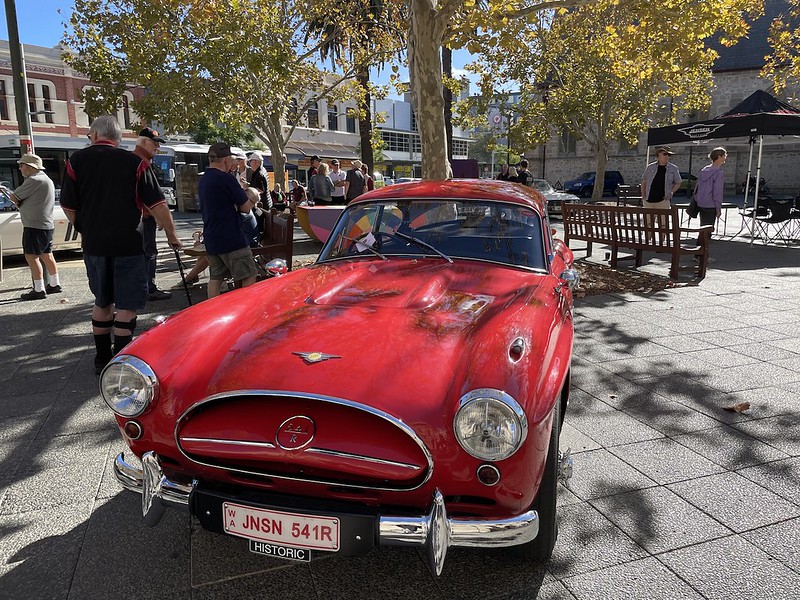
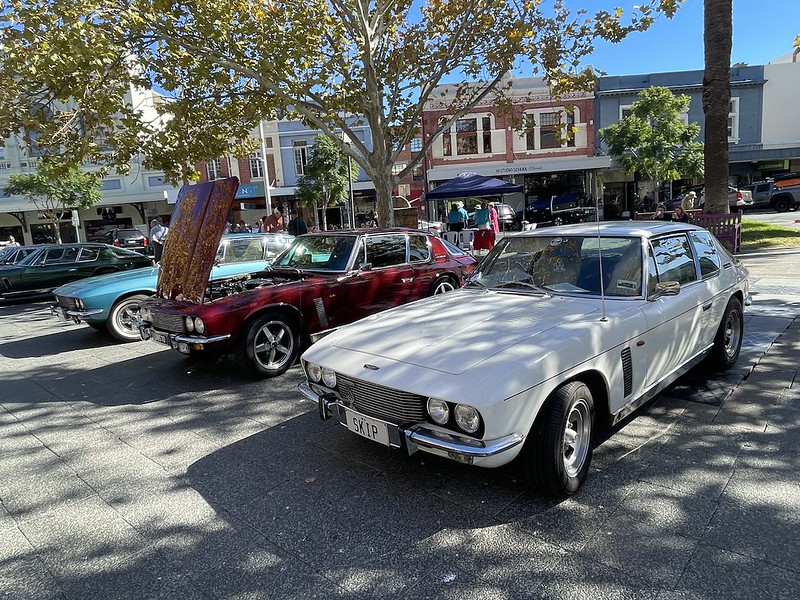
This is more of a bodge than a proper fix. Unlike the classics I keep long term, at some point my wife will want to upgrade to an S212 wagon, so this made sense. The total cost was less than $100. Now the car doesn’t look stupid with a circuit board flapping around in the wind. The Jensen Car Club of Australia (JCCA) was formed in 1987 though the amalgamation of two former Clubs, “The Jensen Interceptor Car Club of Victoria” and the Australia Jensen-Healy Owners Club”. Our feature event is the National Rally, the first which was held in Canberra in 1983. The 2024 National Rally has just been held in Perth, Western Australia (May 3-6th). This is the first Rally to be held in Perth, Western Australia, given the close ties that have formed with the Jensen Motoring Association WA (JMA). There were approximately 70 attendees from all over Australia, two of which drove from Sydney & Gundiwindi states to Perth. Most of the attendees stayed at the Pagoda Resort & Spa, which provided easy access to Perth and all locations on the itinerary. For Naomi and I, this was our fifth National Rally, so it’s always an opportunity to catch up with friends we haven’t seen in person since the last rally. For photos of the 2022 rally, click here. On the Saturday our first stop was the “Motor Museum of WA”. Driving to the venue in our RAV4 Hybrid hire car provided the first opportunity to assess why this vehicle is so popular (I’ll publish a separate review on this) As a Melbournian this venue is instantly familiar as you see a W Class Melbourne Tram going passed the Museum. There are over 200 cars displayed at the Museum representing just about every marque and over 20000 model cars. There are a few special cares, including a 1974 Leyland Force 7 Coupe, 2014 Red Bull RB10 racing car. On the Sunday it was the Club’s opportunity to put on a Show N Shine in Kings Square, Fremantle. The venue was perfect as it was a great opportunity to publicise the marque to the general public. Models included in the display were Jensen-Healey (Including a GT), Interceptor, FF, CV8 and 541R. The 2025 Rally will be hosted by South Australia and will be held in Renmark. Naomi and I are looking forward to driving our Interceptor there. Thanks to all the organisers of 2024 Rally, you all exceeded our expectations. Author: Nick Gruzevskis is a contributor to classicjalopy.com, and the custodian of a great collection of classic and modern cars. Links to some his other articles can be found here Yesterday I did my first proper drive in my 1981 Mercedes 240D. More information about the car can be found here. My overall impression is that the people who talk about the performance of the 240D automatic on the internet have clearly never driven one. I’m used to driving fairly powerful cars like my 220KW 560SEC but I didn’t find the 240D especially slow around town. I drove around my local area in a mix of heavy traffic, back roads and bigger roads with a speed limit of 90km/h. At no time did I feel like I was holding up traffic or that the car was ‘dangerously slow’ like people claim. During the night drive last night, I was even getting away from the group at times. 
In fact, I enjoyed driving the car and would be happy to drive it as a daily. It is certainly more appetizing to me than anything that Mercedes-Benz is making today. You have to adapt to the car and use full throttle a lot more than you would need to in a modern car, but there is something to be said about being able to use all the power a car has. The gearing of the car makes the performance quite good from zero to legal speeds on the motorway. This makes the 240D a good proposition for urban driving and long distance motorway driving. In order to provide good performance, the car needs to be kept in its power band. That means the transmission is kicking down a lot. I could see a situation where the vacuum system had not been maintained and the kickdown switch not working that performance would be poor. In that case the 240D automatic would simply bog down in top gear. 
The one type of driving I could see the 240D being unsuitable for is driving on back roads that require overtaking large trucks at 100km/h. Redline in 3rd gear is around 105km/h, so there is no gear to overtake at those speeds. This is where you want a V8 like a 450. In addition, the 240D struggles to maintain speed on long uphill motorway sections. On the most recent night drive, there were a few of those coming home. Speed would drift down to about 85, then I could kick down and bring it back up to about 95. On more gradual grades it would hold a speed of around 100km/h but no more. This is probably where the extra power of the 300D comes in. On a flat section I was able to cruise at 120km/h so the 240D is generally fine on the motorway. Even on the uphill sections where performance is lacking, it is still faster than the trucks. Driving my 240D, I am reminded what a good transmission the 722.1 is when adjusted properly. Nice crisp changes and a hugely rugged unit. I’m not disappointed that my car is a 240D automatic. The automatic transmission is properly set up and works really well. I also found that over the time I was driving the car, it fixed itself. Moving the temperature wheel around had the A/C kicking into life. I guess just a dirty contact in the switch. At first the lighting for the gear selector didn’t work, but that burst into life at some point. 
The only thing I took out of the drive to add to my todo list was the thermostat. The car ran a little hotter than I think it should for a day in the mid 20s. There is a lot to like about this car, comfortable, cold A/C, and good on fuel. I drove for nearly 100km before the needle moved off the full position. After I had driven the car around for a while, I went to take a few more nice photos. I was passed by some very expensive luxury SUVs and thought that I would much rather drive my cheap 240D. Today I had to go and pick up some things from the inner west of Sydney. Narrow roads and heavy traffic. The 240D was a great car for this, nimble, comfortable and excellent on fuel. Plus the around town performance really is quite good. I’ve now done 350km and the fuel tank is still showing more than half. Of course, its a Mercedes, so once it gets below the half mark, it will be empty in no time, but it really is very good for a car of this age. People who think these are dangerously slow should actually drive one. I’m really enjoying mine. The April 2024 night drive was a repeat of a route we last did two years ago. On that night, I tried two different cars before withdrawing, both of them having brake issues. In addition, recent bad weather kept the numbers down. This month was a much better experience all around. The drive was dubbed the ‘Bridge to Bridge’ drive. Basically we would take the back roads from Windsor Bridge in the north west to Peats Ferry Bridge in the north, going via Berowra Waters ferry. Since it was a double demerits weekend, the 240D seemed like the perfect car for the drive. It was also a good opportunity to see how it went on twisty roads and a motorway section. Our meeting point was McDonalds in Windsor, where we had six cars on the drive. These were my 240D, a 380SEL and 380SEC, W124 230E, 300TE and a modern C350 diesel. 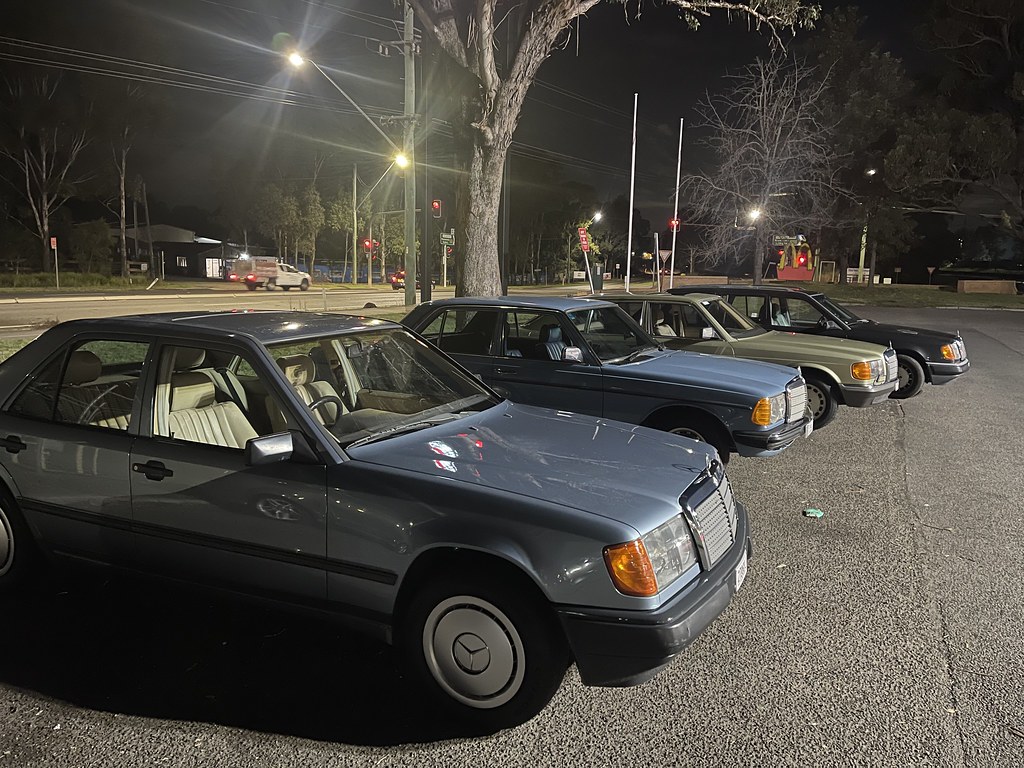
My 240D was in the lead and was quickly able to show that the 240D is not the slow car people think. Our drive started going up past Scheyville to Cattai ridge road and then taking that towards the Berowra Waters Ferry. From there, we took the Old Pacific Highway to Peats Ferry Bridge, before taking the motorway back to our ending point at a 7/11 in Berowra. As usual for these types of drive, there was very little other traffic on the road. Our group was a good size to catch the Ferry and we were all able to stay together. After the 7/11 stop, it was a 40 minute drive back for me, with a motorway section first. 
My 240D did well, and it continues to show what a great car it is to drive. It handled the twisty sections well, and the car had plenty of power for most of the drive. The only section is struggled a bit was the long uphill motorway section going south from Peats Ferry Bridge. Speed would slowly sink down to about 85km/h where I could kick down and then accelerate back up to about 95 before repeating the process. Once the road flattened out, I was able to maintain 110km/h, although there were some slight gradients that pulled speed back. I only noticed two things about the car. The first was that even at night the temperature seemed to high. It would mostly sit around 100C. It generally didn’t get much lower, but occasionally it would go down to about 90C. During the second motorway section it rose to about 110C, and I had to back off and turn on the heater. My theory is that I have a sticky thermostat, as by the time I got home, the temperature seemed in the mid 80s. My first port of call will be to change the thermostat and see if that improves things. 
When I parked the car, I also noticed that the oil cooler was cold to the touch. I will keep an eye on this, I would rather not change the oil thermostat as that seems like a major job. Overall, I was very happy with the 240D and I enjoyed taking it on the drive. I probably gave it an ‘Italian tune up’ of sorts. With the 240D now registered and in the garage, there were a few simple jobs to undertake. The first was a set of floor mats. The original carpets were in such nice shape I wanted to protect them. I though the ideal floor mats for the 240D are the dealer fitted thick rubber mats from that era. Its likely what the car had when new. I had one more partial set of those mats in my parts storage – just missing a drivers mat. For the drivers mat I had to substitute a cheap generic mat. If I can’t find another drivers mat, I may move the mats from the 450SLC to the 240D and replace those.  Next was to check tyre pressures including the spare. The spare was quite low, and ancient. At some point I’ll replace the main tyres and put the best one as the spare. Next was to check tyre pressures including the spare. The spare was quite low, and ancient. At some point I’ll replace the main tyres and put the best one as the spare.
After that was the oil change. I spoke to somebody who used to service these cars when new and I was advised not to bother with a specific diesel oil and use the regular Penrite 20W/50. The oil was black, but that seems to be the norm in a diesel. When I removed the filter, everything looked ok. 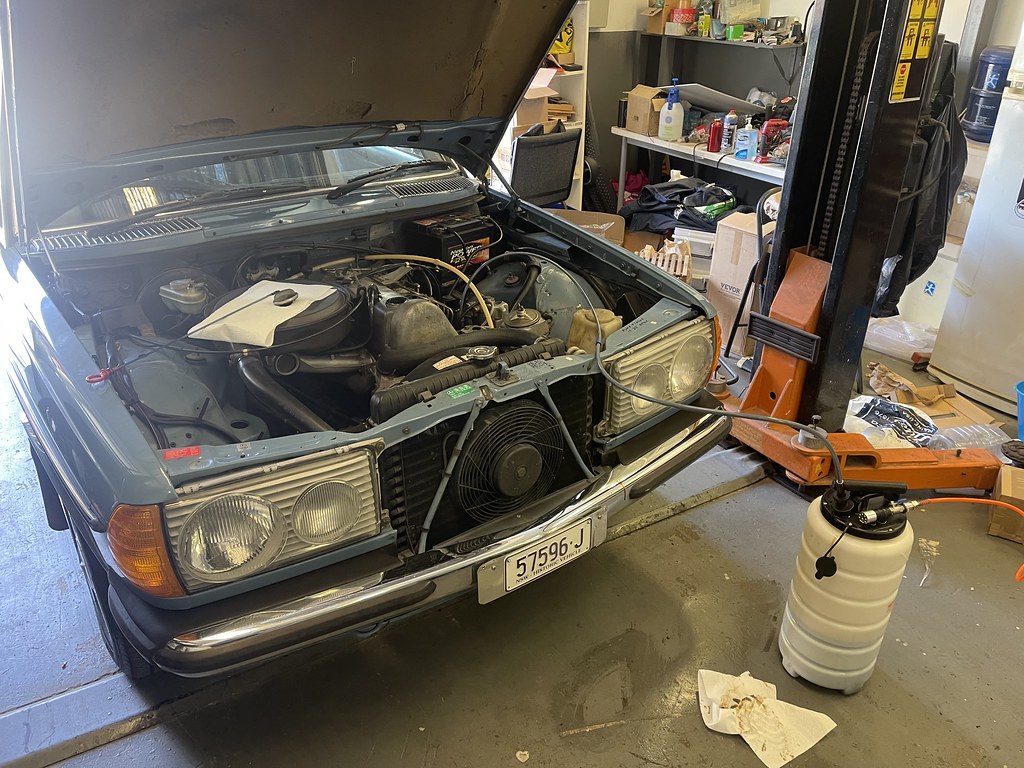 I would have preferred to drain the oil from underneath using the hoist, so I could inspect the underside of the car. However, my hoist is currently broken so I sued the vacuum pump. The 240D has quite a large oil capacity for a four cylinder engine. I would have preferred to drain the oil from underneath using the hoist, so I could inspect the underside of the car. However, my hoist is currently broken so I sued the vacuum pump. The 240D has quite a large oil capacity for a four cylinder engine.
Since I don’t know when the last oil change was, I’ll probably do another one with a much shorter interval. I also gave the car a wash after its trip on the tow truck. Even the wheel arches are quite clean on this car. When I got the pink slip, the mechanic who did it suggested I change the motor mounts and the transmission shift bushings. I’ve ordered some, and will add that to the to-do list. 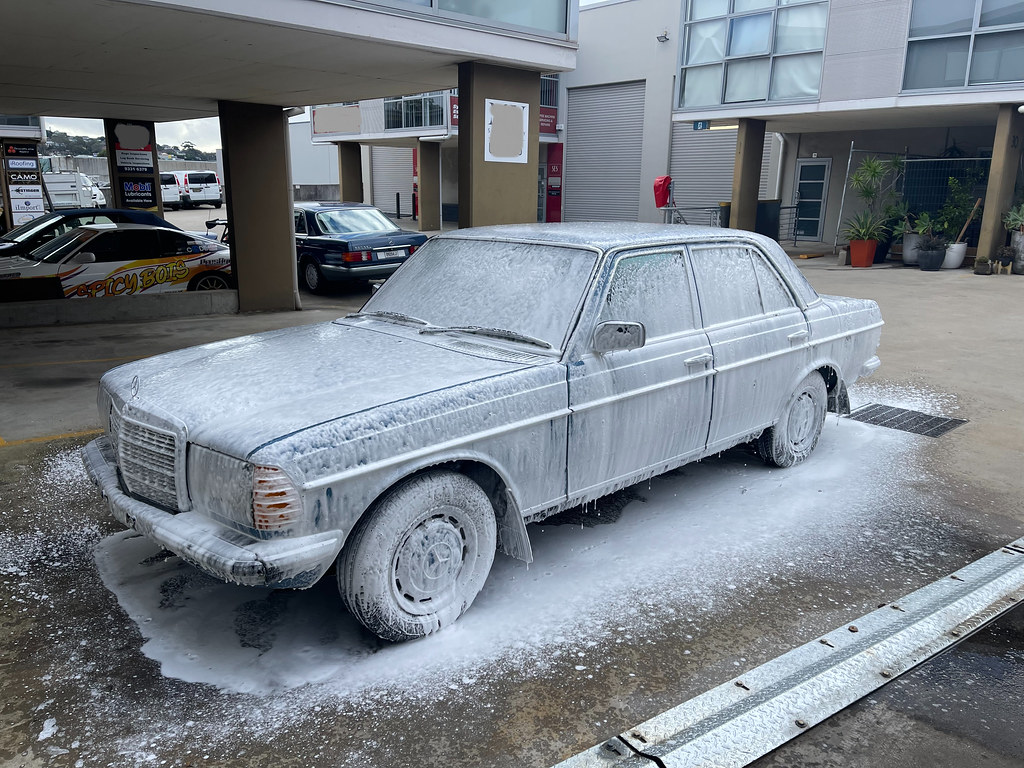 The fuel gauge was indicating a little over half a tank. The easiest way to make sure that is working was to fill the tank to the top. This verified that the gauge was now working and I had a full tank of diesel. The fuel gauge was indicating a little over half a tank. The easiest way to make sure that is working was to fill the tank to the top. This verified that the gauge was now working and I had a full tank of diesel.
Looking around the car, I noticed that the first aid kit was missing. Luckily I had one that I was able to add. Not for use, but I like these things to be correct. I was now ready for a longer drive in the car. | |